Bitrix24 Integration
Streamline Payment Processing with Razorpay Bitrix24 Integration
Streamline Payment Processing with Razorpay Bitrix24 Integration

The Razorpay Bitrix24 Integration app streamlines payment processing by generating payment links for invoices, deals, and smart processes. Once payment is made, the transaction status is automatically updated to "Paid," simplifying workflows.
The Razorpay Bitrix24 Integration app is designed to simplify payment collection and management within Bitrix24. With this integration, you can effortlessly generate payment links for invoices, deals, and smart processes where receiving payments is applicable. These payment links can be shared directly with your customers, providing them with a convenient and secure way to complete transactions.
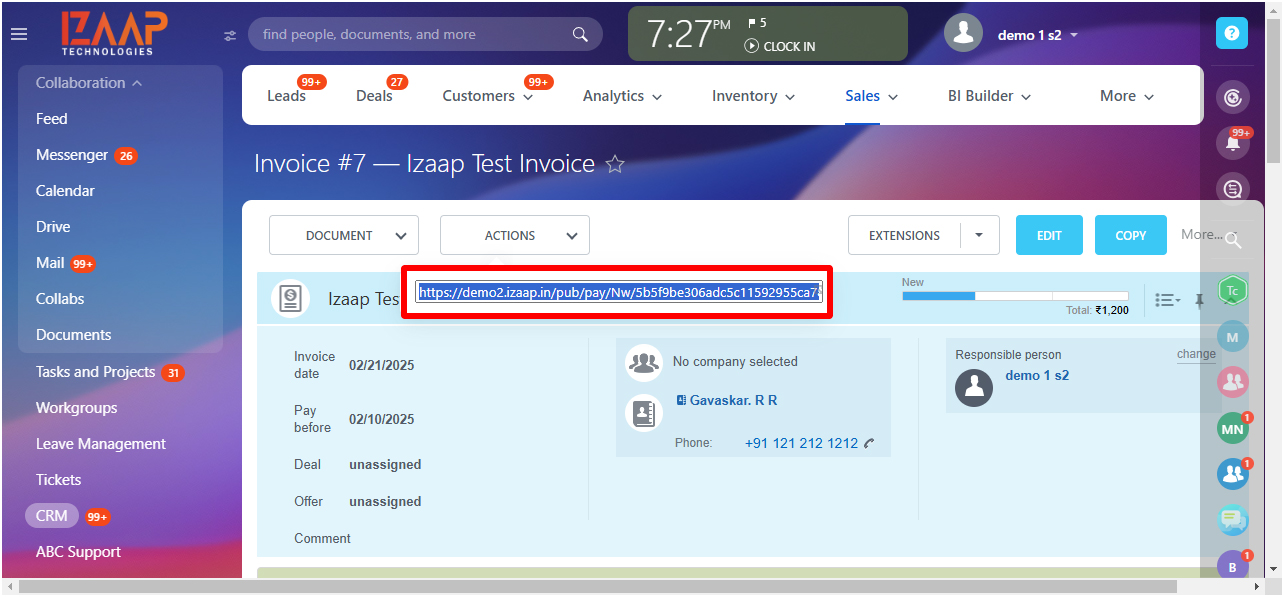
Once the payment is successfully processed, the app automatically updates the transaction status to "Paid" in Bitrix24, ensuring your records are always accurate and up-to-date. This eliminates manual tracking and reduces the risk of errors, saving you time and effort.
Generate payment links for invoices, deals, and smart processes.
Automatically update transaction status to "Paid" upon successful payment.
Streamline payment collection and reconciliation processes.
Enhance customer experience with secure and easy payment options.
Ideal for businesses looking to automate their payment workflows, the Razorpay Bitrix24 Integration ensures a seamless and efficient payment experience for both you and your customers.
Note: Enjoy a 15-day free trial by emailing us at apps@izaaptech.com to activate it. Once the trial period ends, you can choose from the following subscription plans:
1. Visit the Razorpay site with the appropriate credentials. Navigate to Account & Settings → API Keys (under Website and app settings) → Generate Key to generate key for the selected mode and store it in secure place.
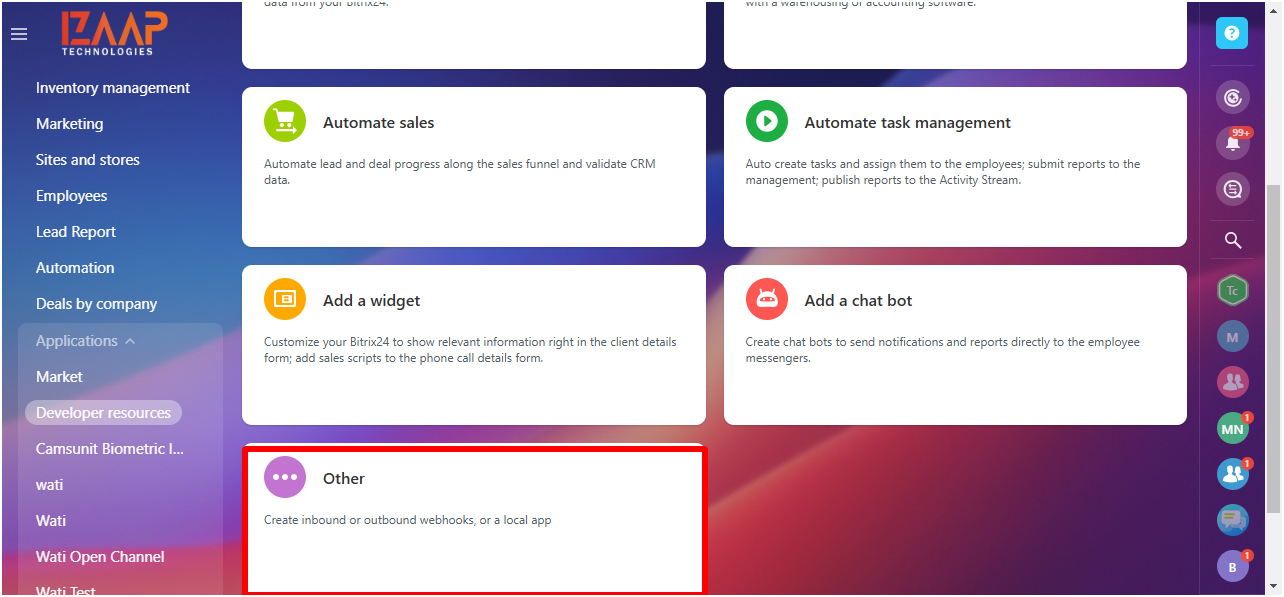
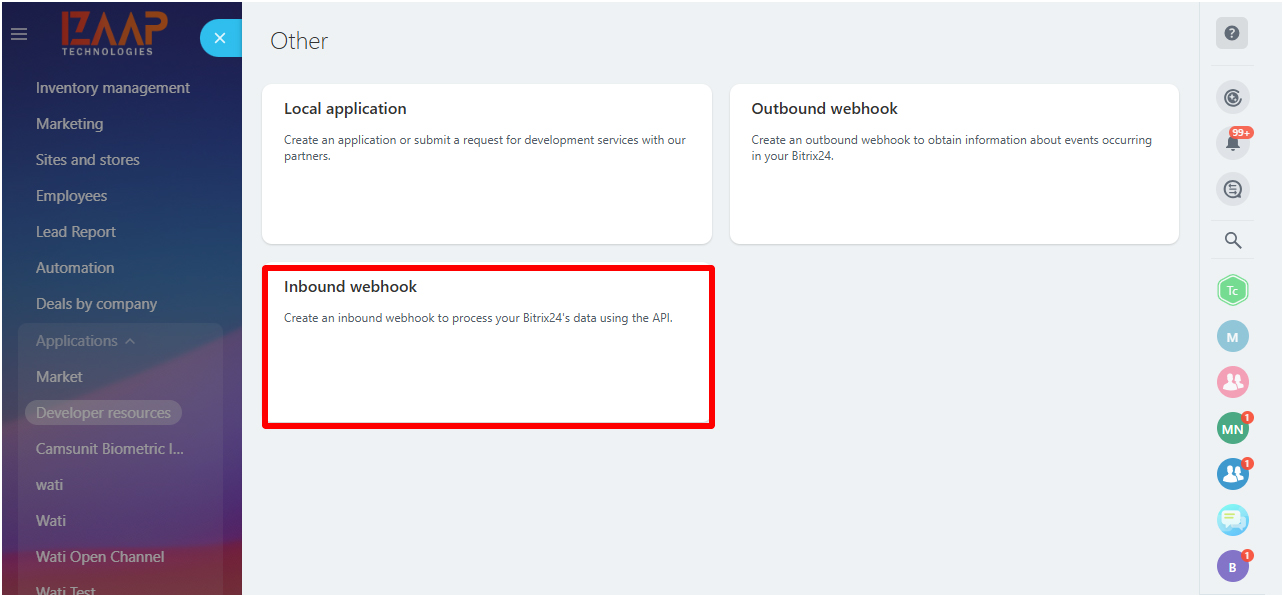
2.Create inbound webhookurl in Bitrix CRM with CRM, Payment System and Online Store scope..
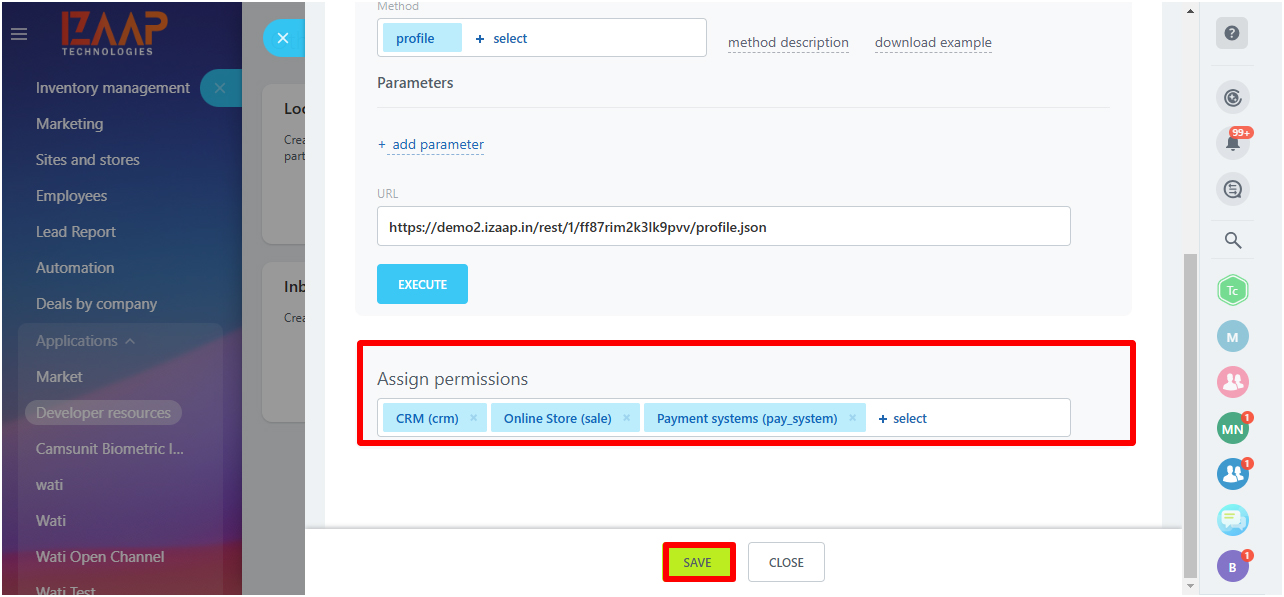
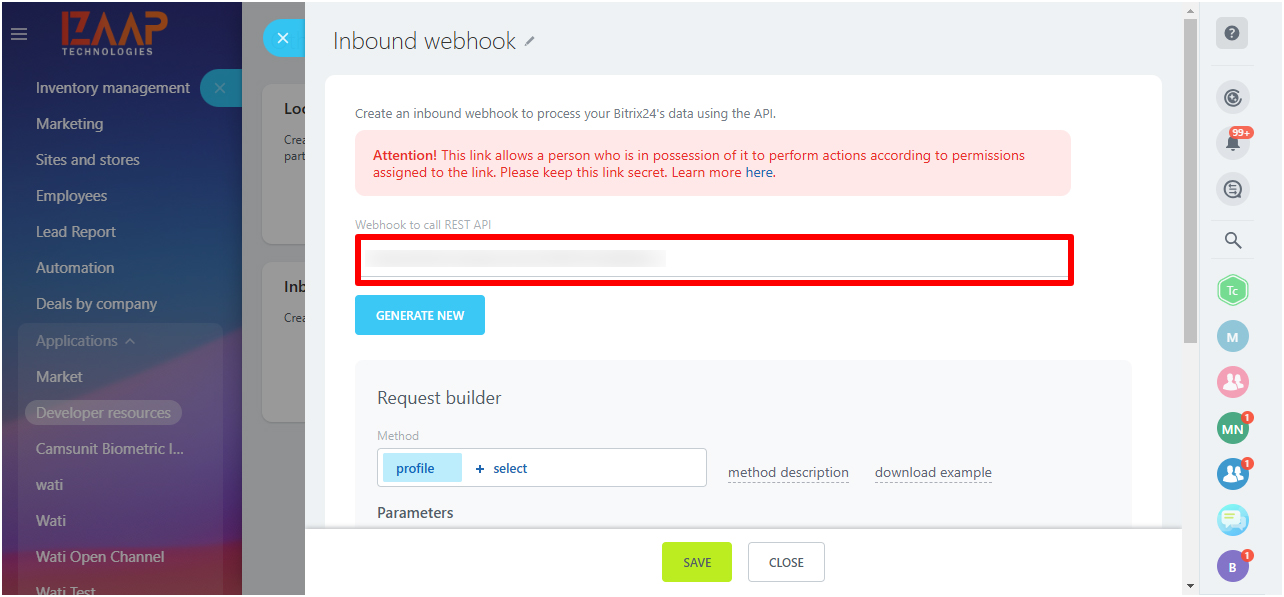
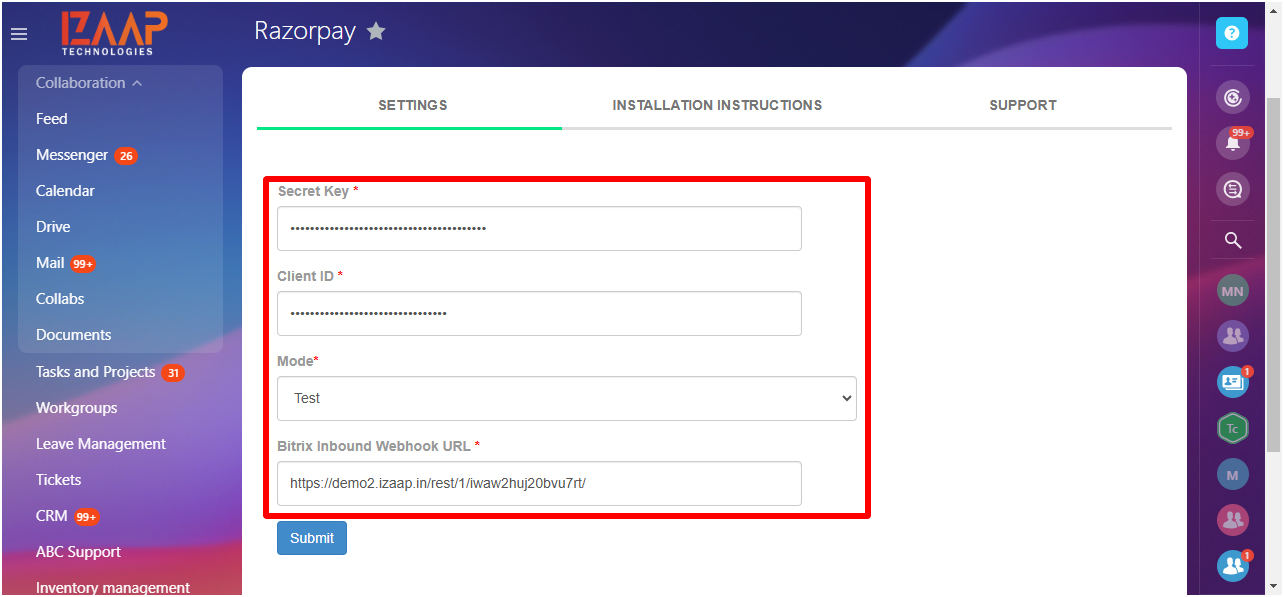
3. Copy the Client ID and Secret Key from Step 1, and the Inbound Webhook URL from Step 2. Then, paste them into their respective fields in the Bitrix Marketplace app settings tab after installing the app. Choose the payment mode (Test/Live) based on your needs.
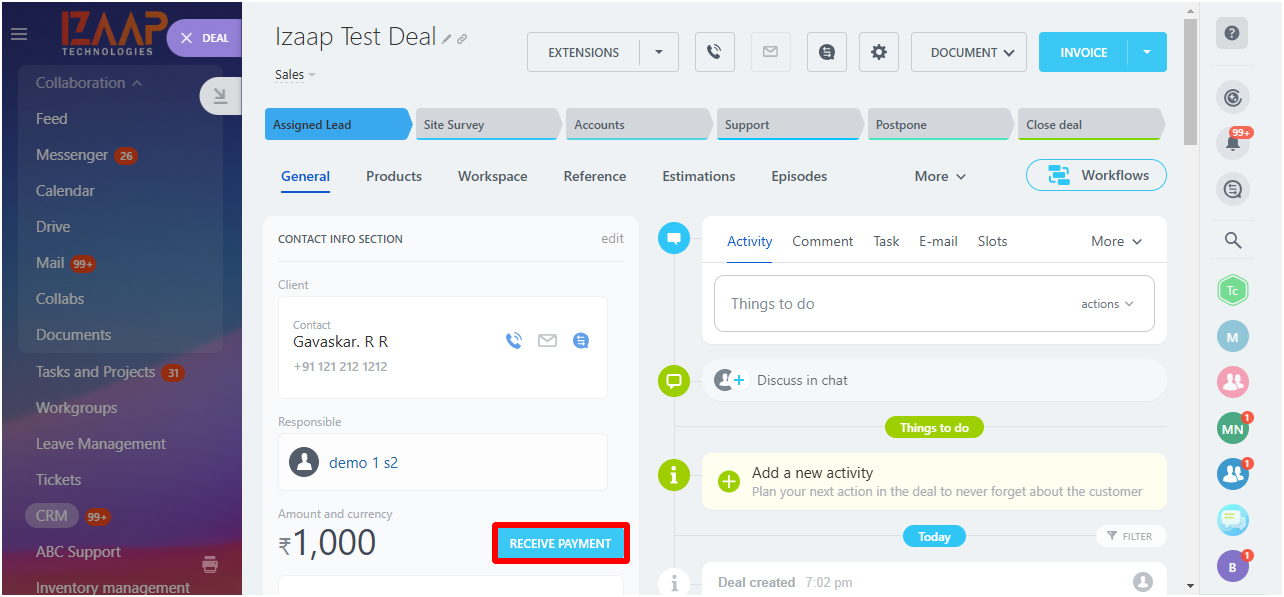
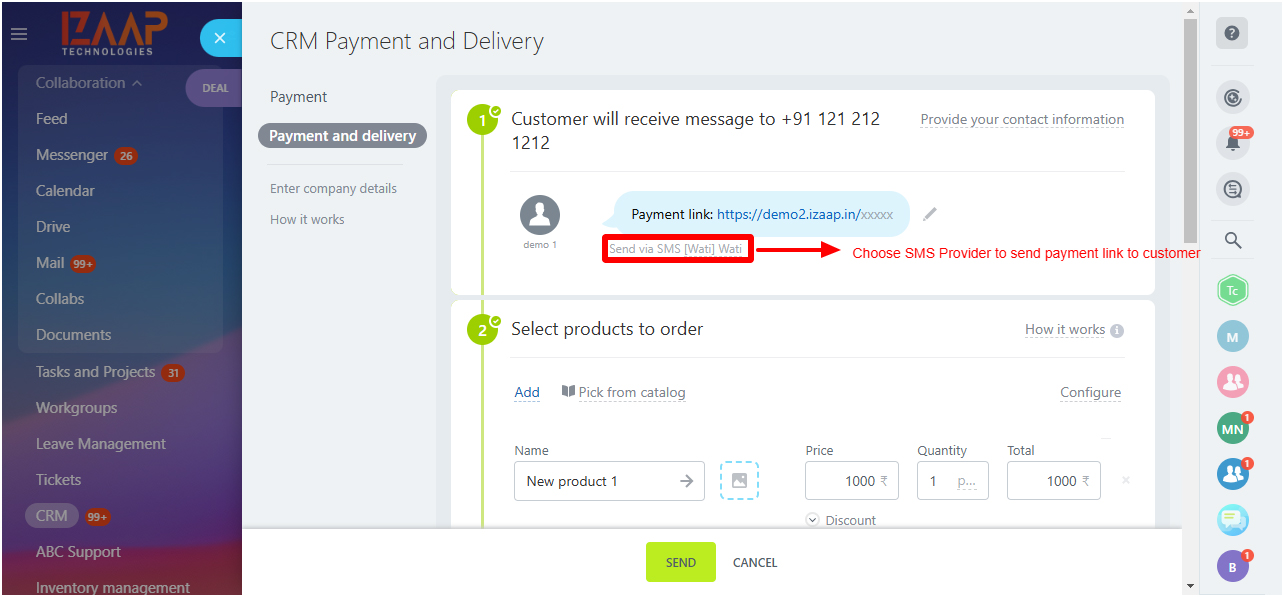
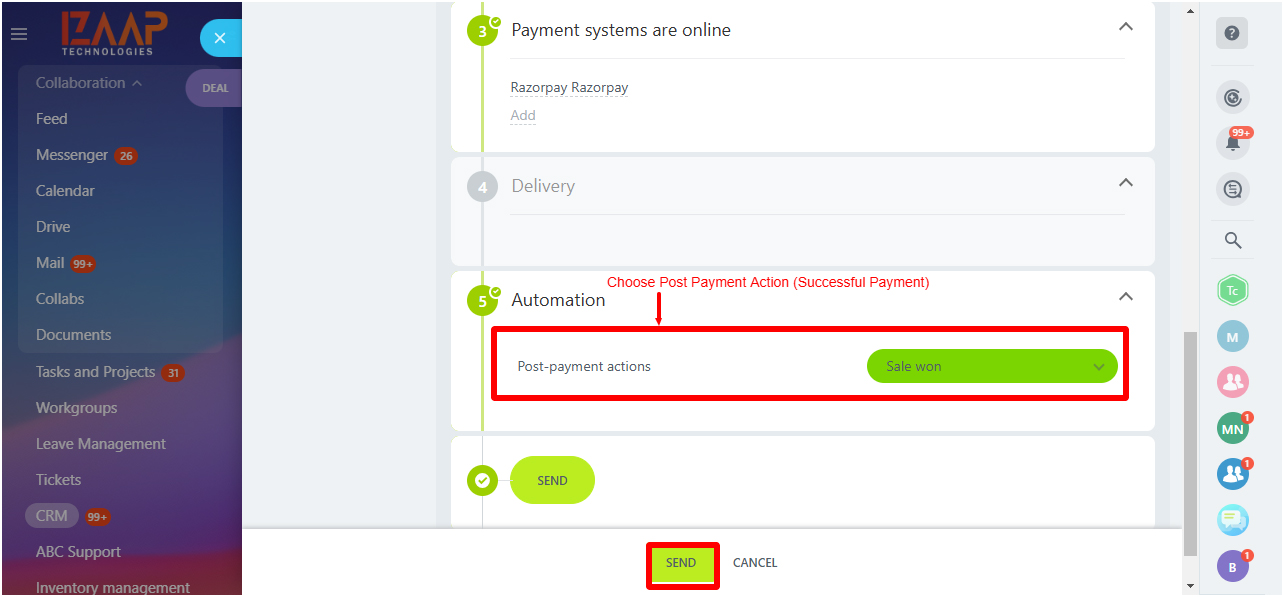
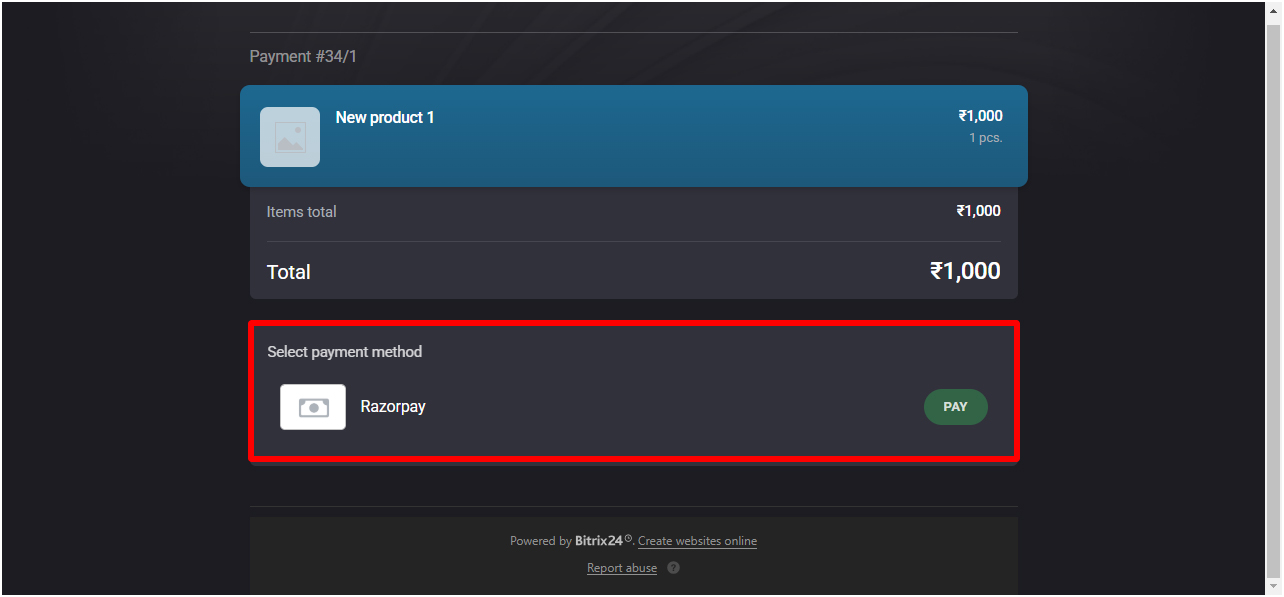
4. Go to the CRM Entity Section (Deal/Smart Process Automation). Create a new CRM entity and choose a product from the Product tab. Once the CRM entity is created, click the "Receive Payment" option in the detailed page under the amount and currency fields. On the "Receive Payment" page, choose Cashfree as the payment system, select Post Payment Action in the automation section, and also choose the SMS provider to send the payment link to the customer via SMS. Afterward, click the "Send" option at the bottom of the screen. The payment link will be sent to the customer via SMS. In the payment link page, the customer can choose the Razorpay payment option and complete the payment. Once the payment is completed, the order status will be updated to Paid, and the CRM entity stage will move to Won, based on the selection you made in the Post Payment Action. If the payment fails, the failure reason will be stored in the respective customer contact timeline section.
5. For the older version of the invoice, please visit the Invoice (Old Version) page and create a new invoice. Once the invoice is created, choose the Invoice Link fr om the ACTION button at the top of the invoice detailed page. Copy the invoice link and send to customer via email. Customer can select the Razorpay option fr om the invoice link and click Go. This will redirect to the Razorpay payment page. Once the payment is completed, the invoice status will be updated to Paid. In the case of a payment failure, the invoice status will change to Unpaid.