Bitrix24 Integration
Seamless WhatsApp Messaging within Bitrix24
Seamless WhatsApp Messaging within Bitrix24

Enhance your customer communication and streamline workflows with the WATI Bitrix24 Integration. This powerful tool allows you to engage with customers effortlessly through WhatsApp, directly from your Bitrix24 platform
Sign up for WATI Get WATI PluginThe WATI Bitrix24 Integration is the ultimate solution for businesses aiming to:
To use the Bitrix24 Wati integration, you must have an active Wati Pro or Business Plan subscription. This feature is exclusively available for Pro+ plan customers. Ensure your Wati subscription meets this prerequisite before proceeding.
The WATI Bitrix24 Integration enables businesses to seamlessly communicate with customers via WhatsApp directly within the Bitrix24 CRM platform. This powerful integration simplifies workflows, boosts customer engagement, and centralizes all communication within Bitrix24. With this integration, you can send WhatsApp Campaigns using META-approved templates, respond to service messages, assign customer inquiries to available agents in the queue, and automatically create leads or contacts. This ensures a unified and organized contact database, enhancing efficiency and productivity for your business.
Send WhatsApp template messages directly from Bitrix24 via WATI. Perfect for workflows and marketing campaigns to boost outreach.
Receive and respond to customer messages instantly within Bitrix24, ensuring quick and efficient communication.
Inbound messages are automatically linked to the corresponding lead/contact in Bitrix24 CRM. This helps maintain an organized communication trail, making customer management more efficient.
This feature helps to store all customer conversations. This allows you to leverage the full range of open channel features for enhanced communication.Each customer inbound messages can also be assigned to multiple support / sales agents defined in the queue using the Bitrix24 Open channel feature.
When a message is received, the recipient's phone number is used to automatically create a lead/ contact/deal in Bitrix24 as per Bitrix Open channel configuration. If a contact already exists, the message is linked to the existing contact without creating duplicate entries. This ensures a clean and organized CRM database.
Explore key features and functionality of the WATI Bitrix24 app with the screenshots and instructions below:

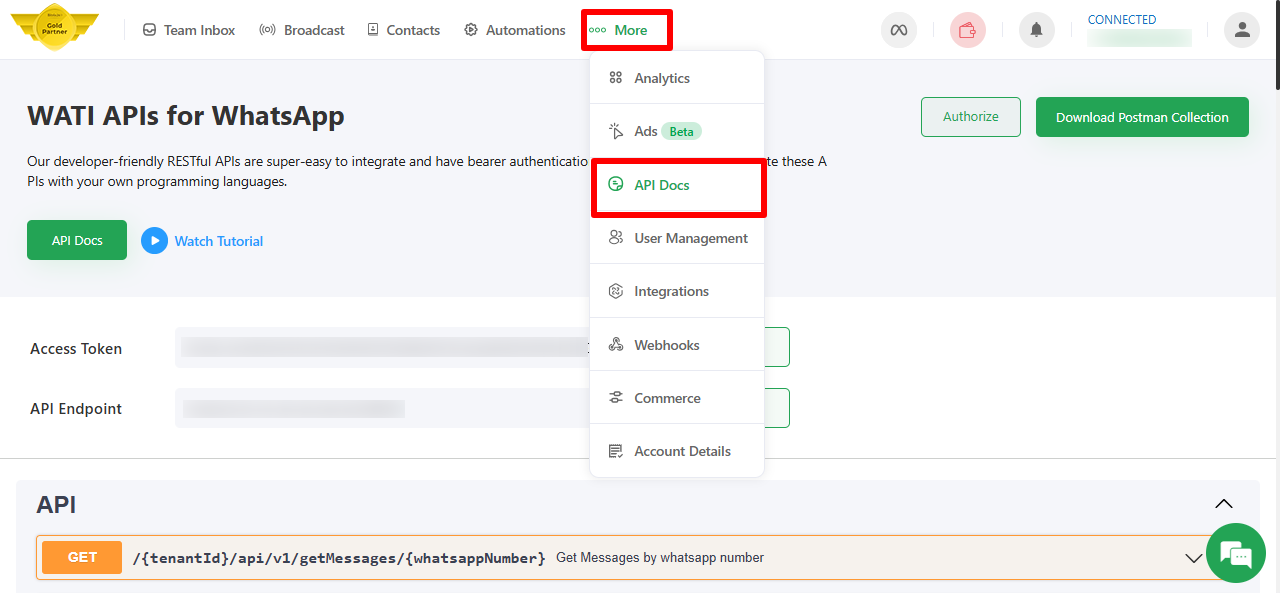
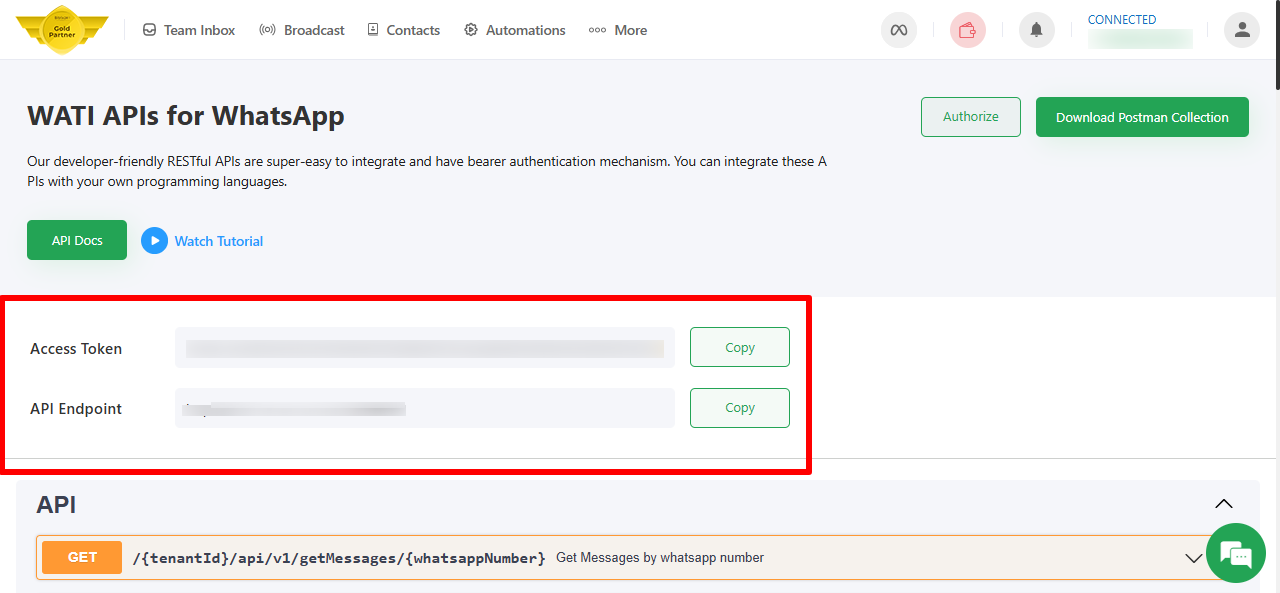
Log in to your WATI account and navigate to More → API Docs. Copy the Access Token and API Endpoint URL, as these will be required for the integration process.
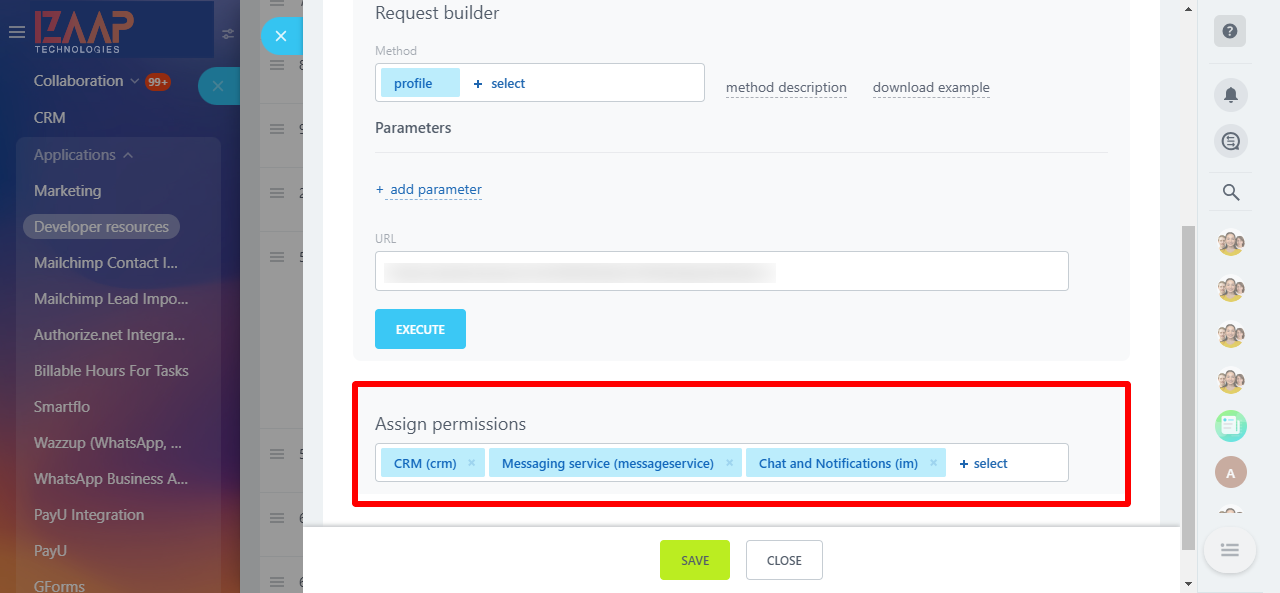
In Bitrix24, go to the Application menu, then select Developer Resources > Others > Inbound Webhook> Create. Assign the necessary permissions by choosing the following scopes: CRM, Messaging Service, and Chat and Notifications, and save the settings. Next, copy the webhook URL from the field labeled "Webhook to call REST API". This webhook will enable seamless communication between WATI and Bitrix24.
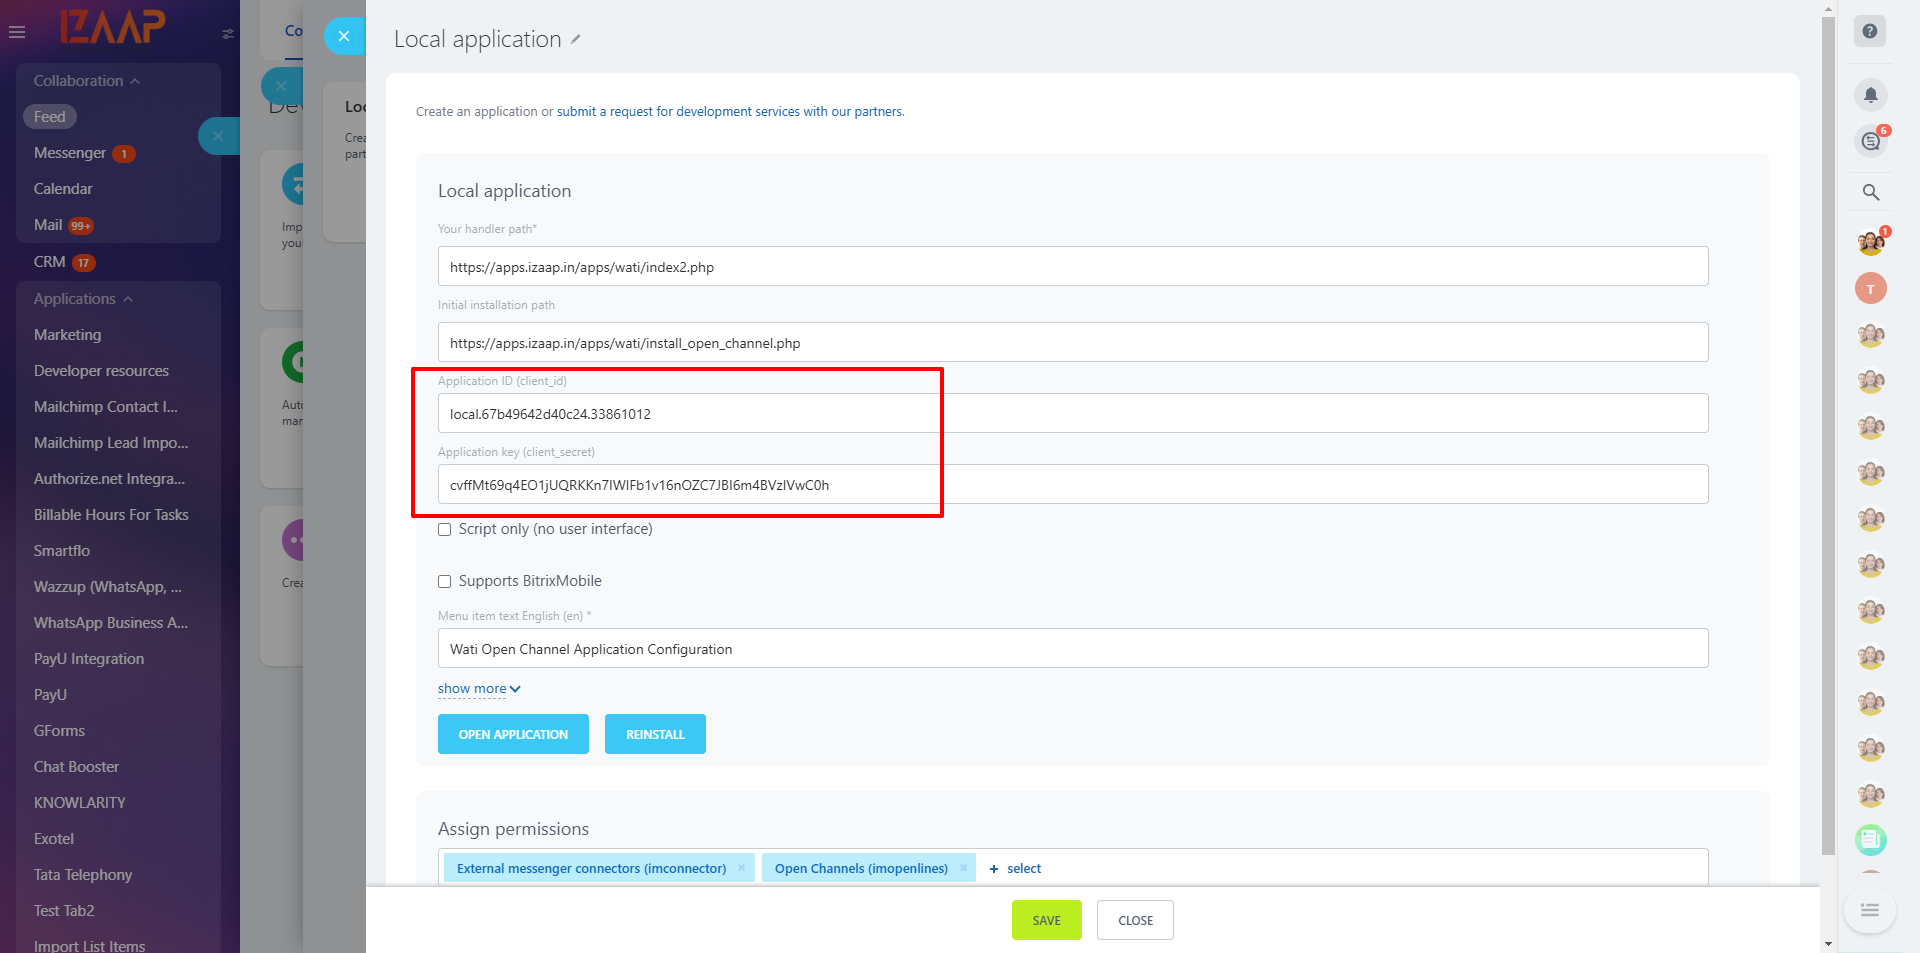
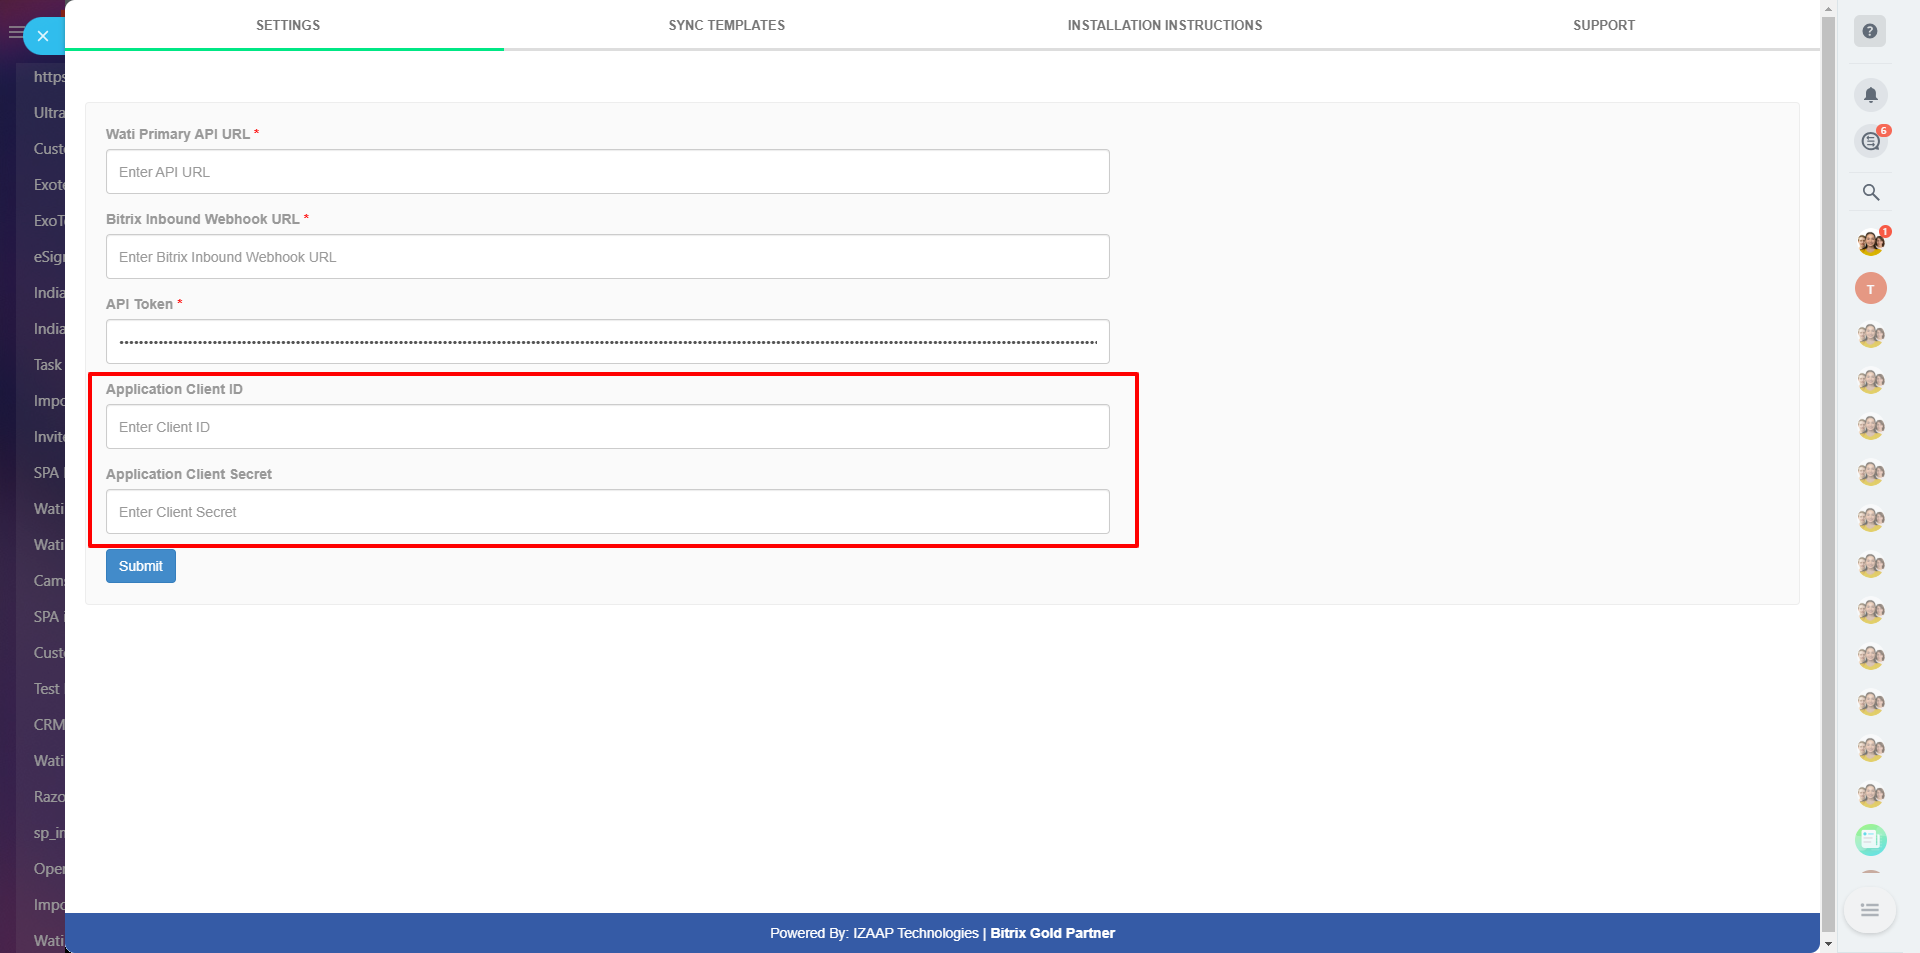
After installing the WATI app from the Bitrix24 Marketplace, go to the app settings. Paste the WATI API Endpoint, Access Token, and Bitrix inbound webhook details( copied from step 1 and 2) into the respective fields. Note: For open channel configuration, create a new application on the Bitrix24 Developer Resources page. Once the application is created, copy the Client ID and Client Secret and paste them into the corresponding fields (Application Client ID and Application Client Secret) on the same page.
Note: For open channel configuration, create a new application on the Bitrix24 Developer Resources page. Once the application is created, copy the Client ID and Client Secret and paste them into the corresponding fields (Application Client ID and Application Client Secret) on the same page.
Detailed steps for open channel configuration in Bitrix24
1.Log in to the Bitrix Application and Access Developer Resources

2. Navigate to Common Use Cases
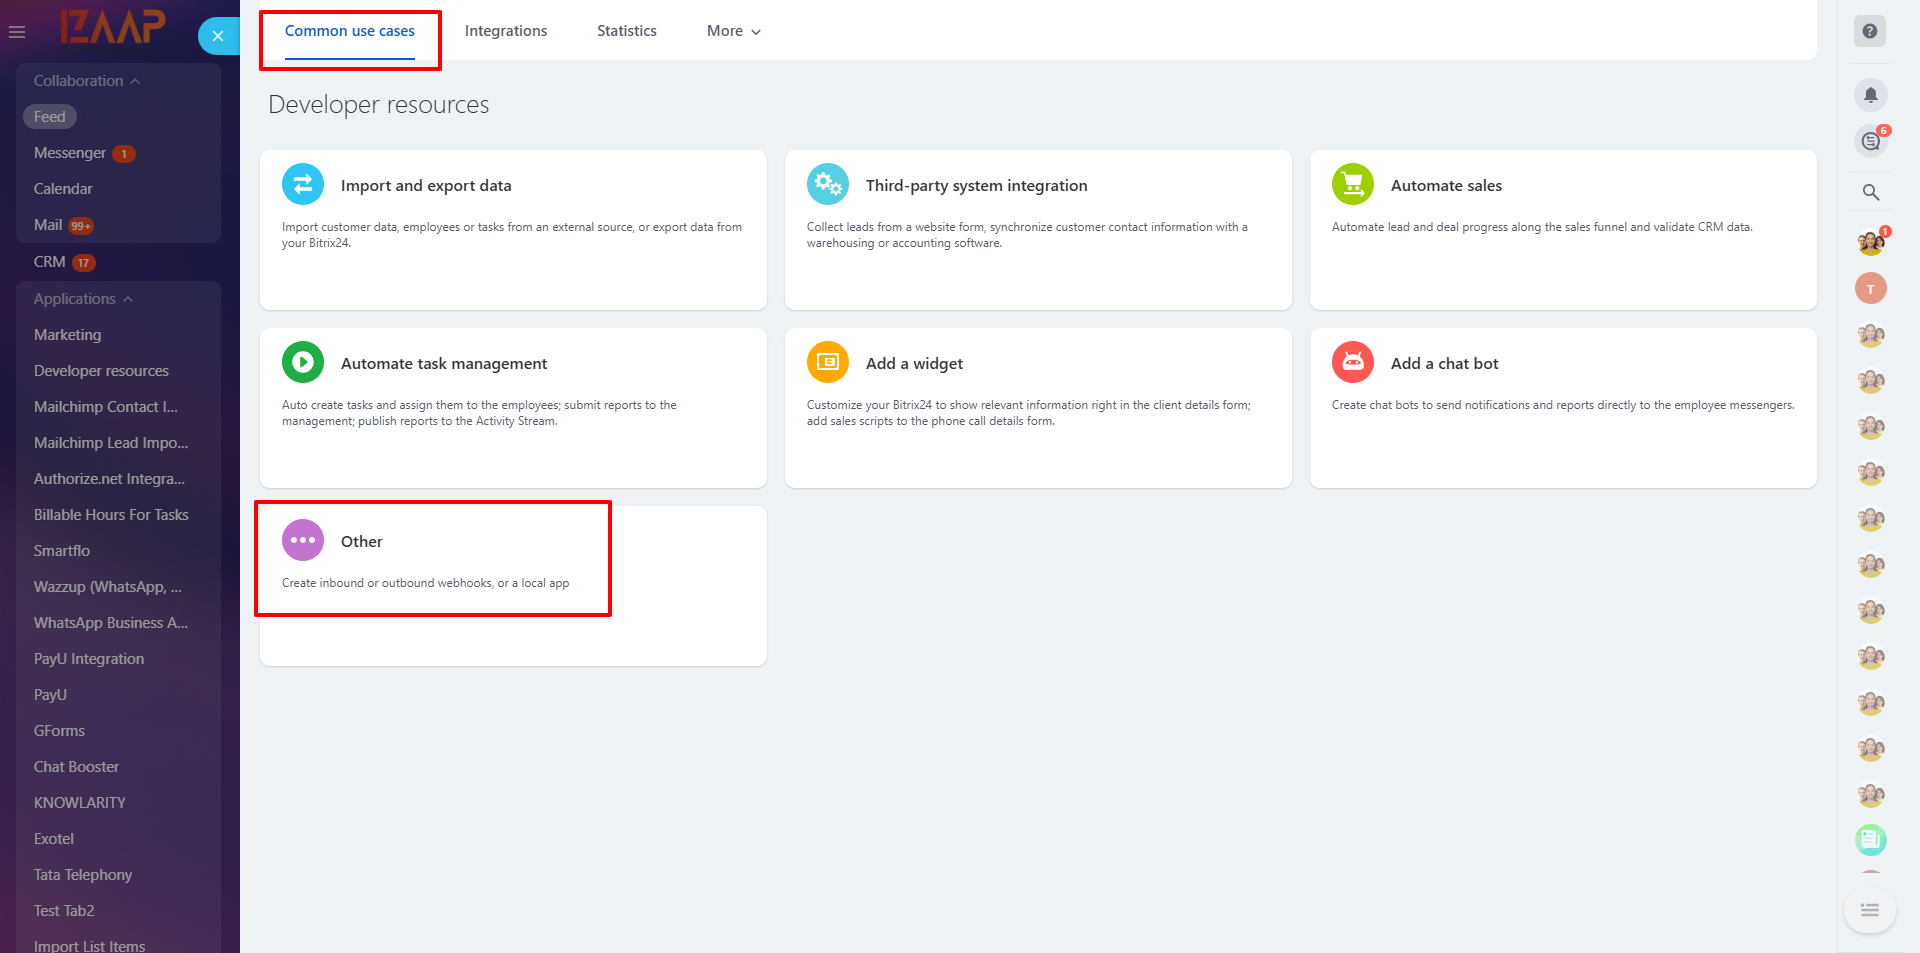
3. Set Up Local Application Configuration
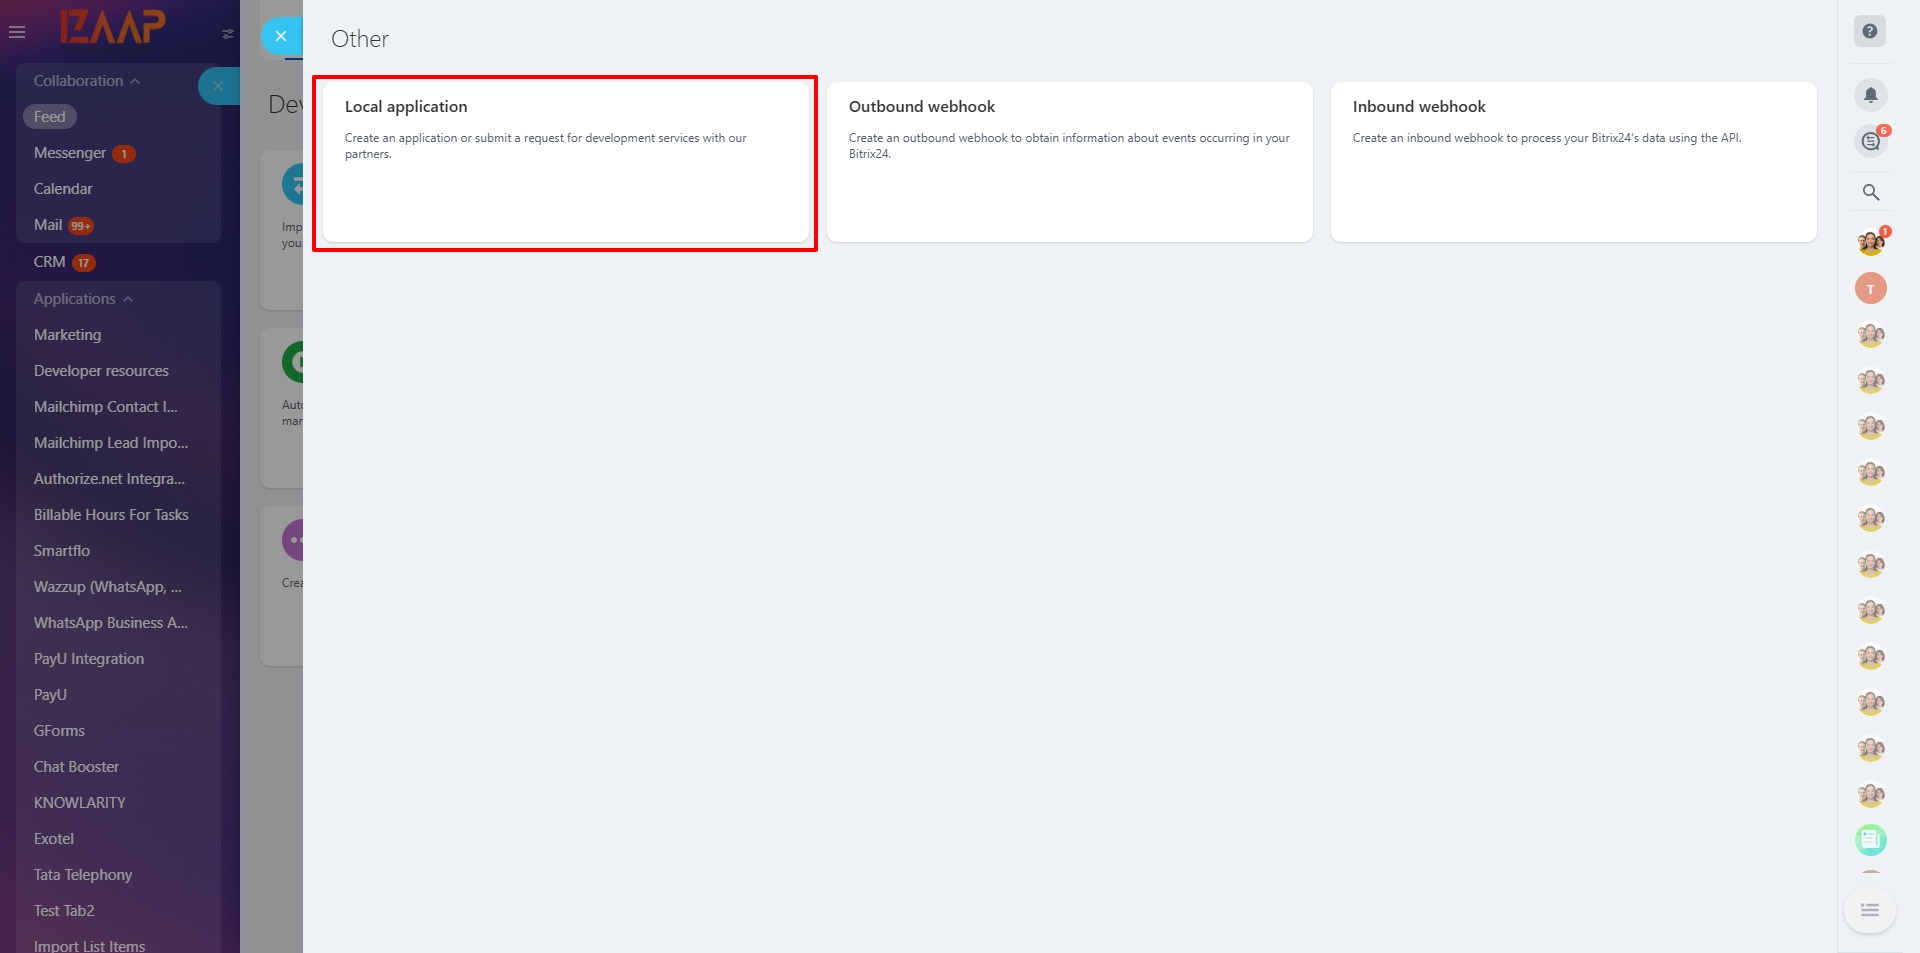
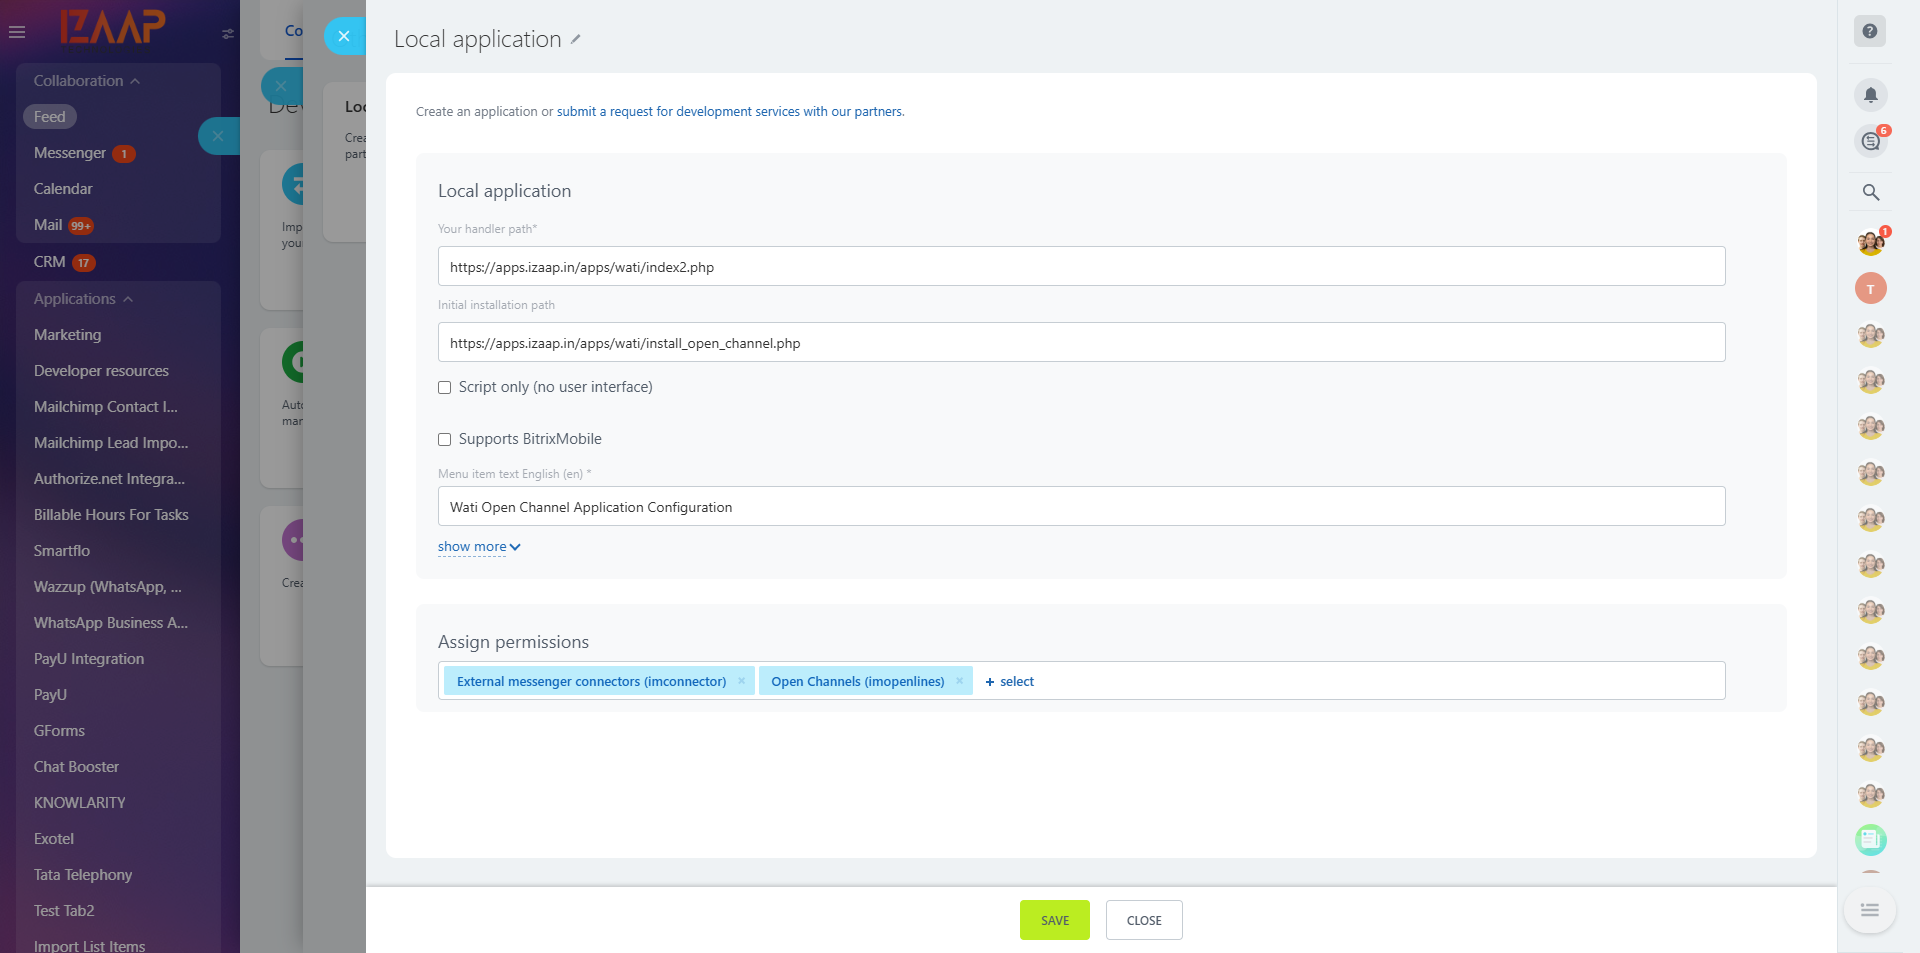
4. Copy Client ID and Secret Key, Then Reinstall the Application
5.Access the Contact Center Page
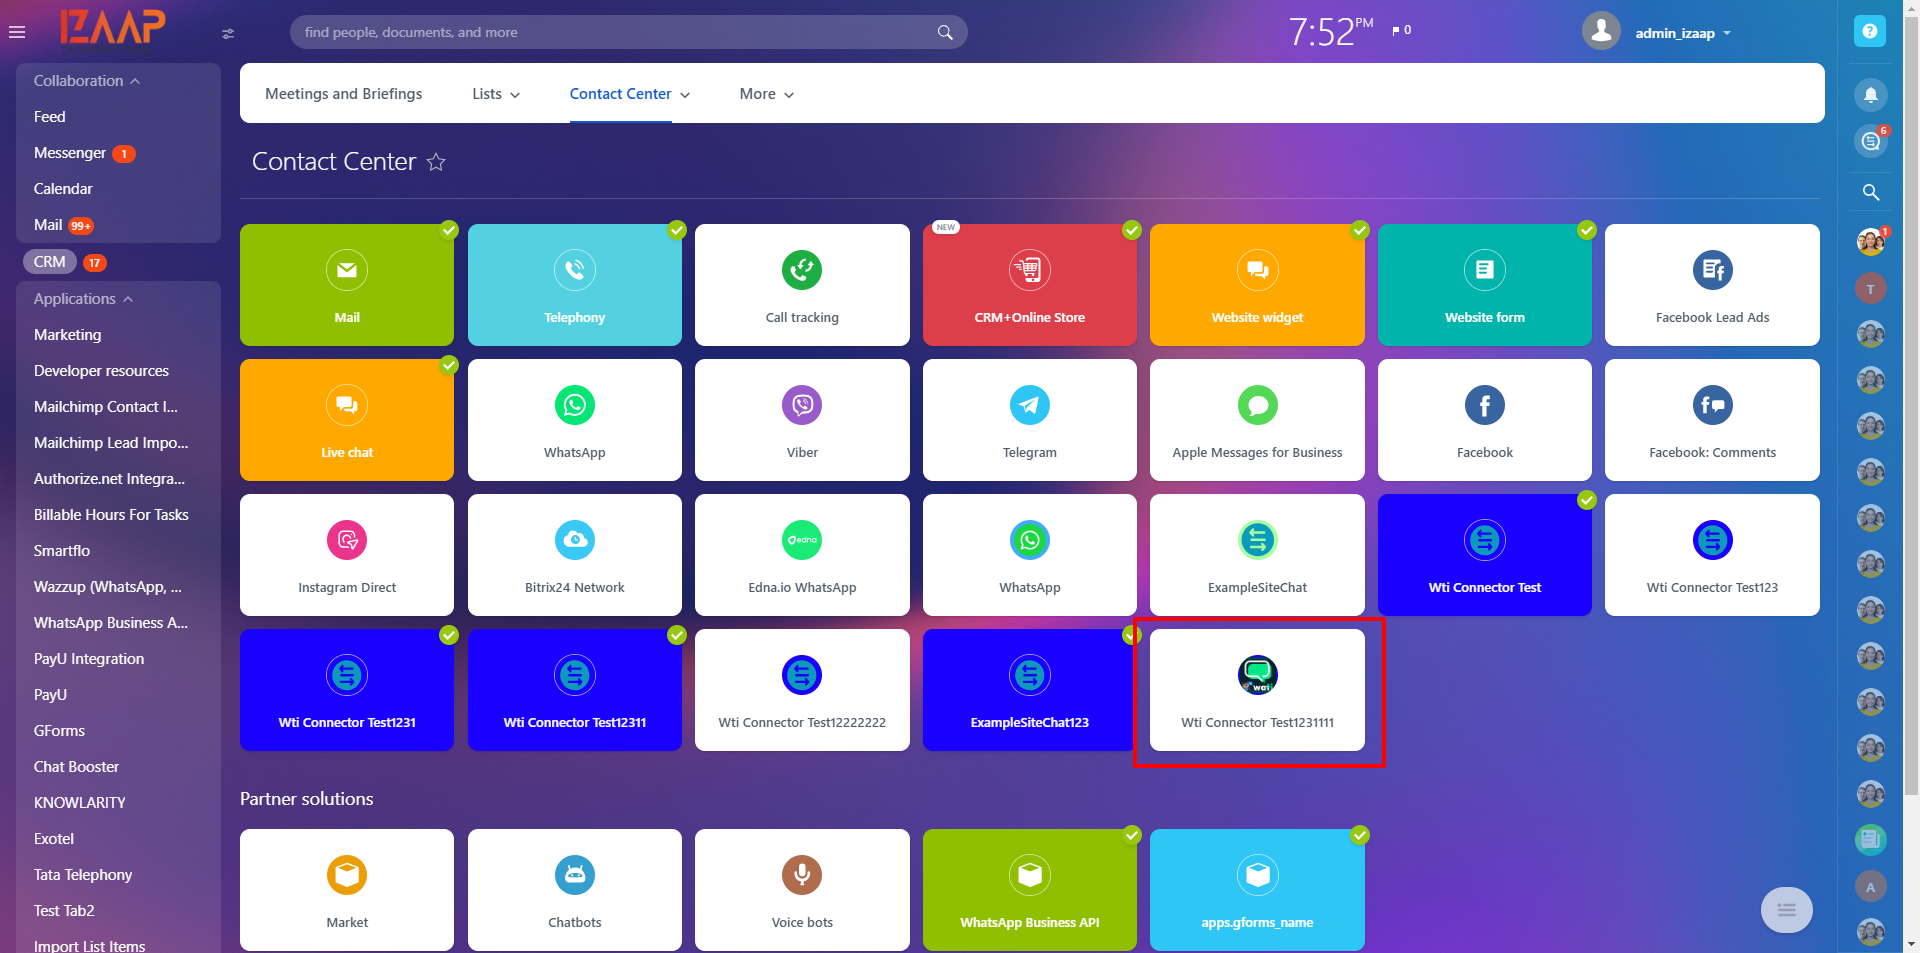
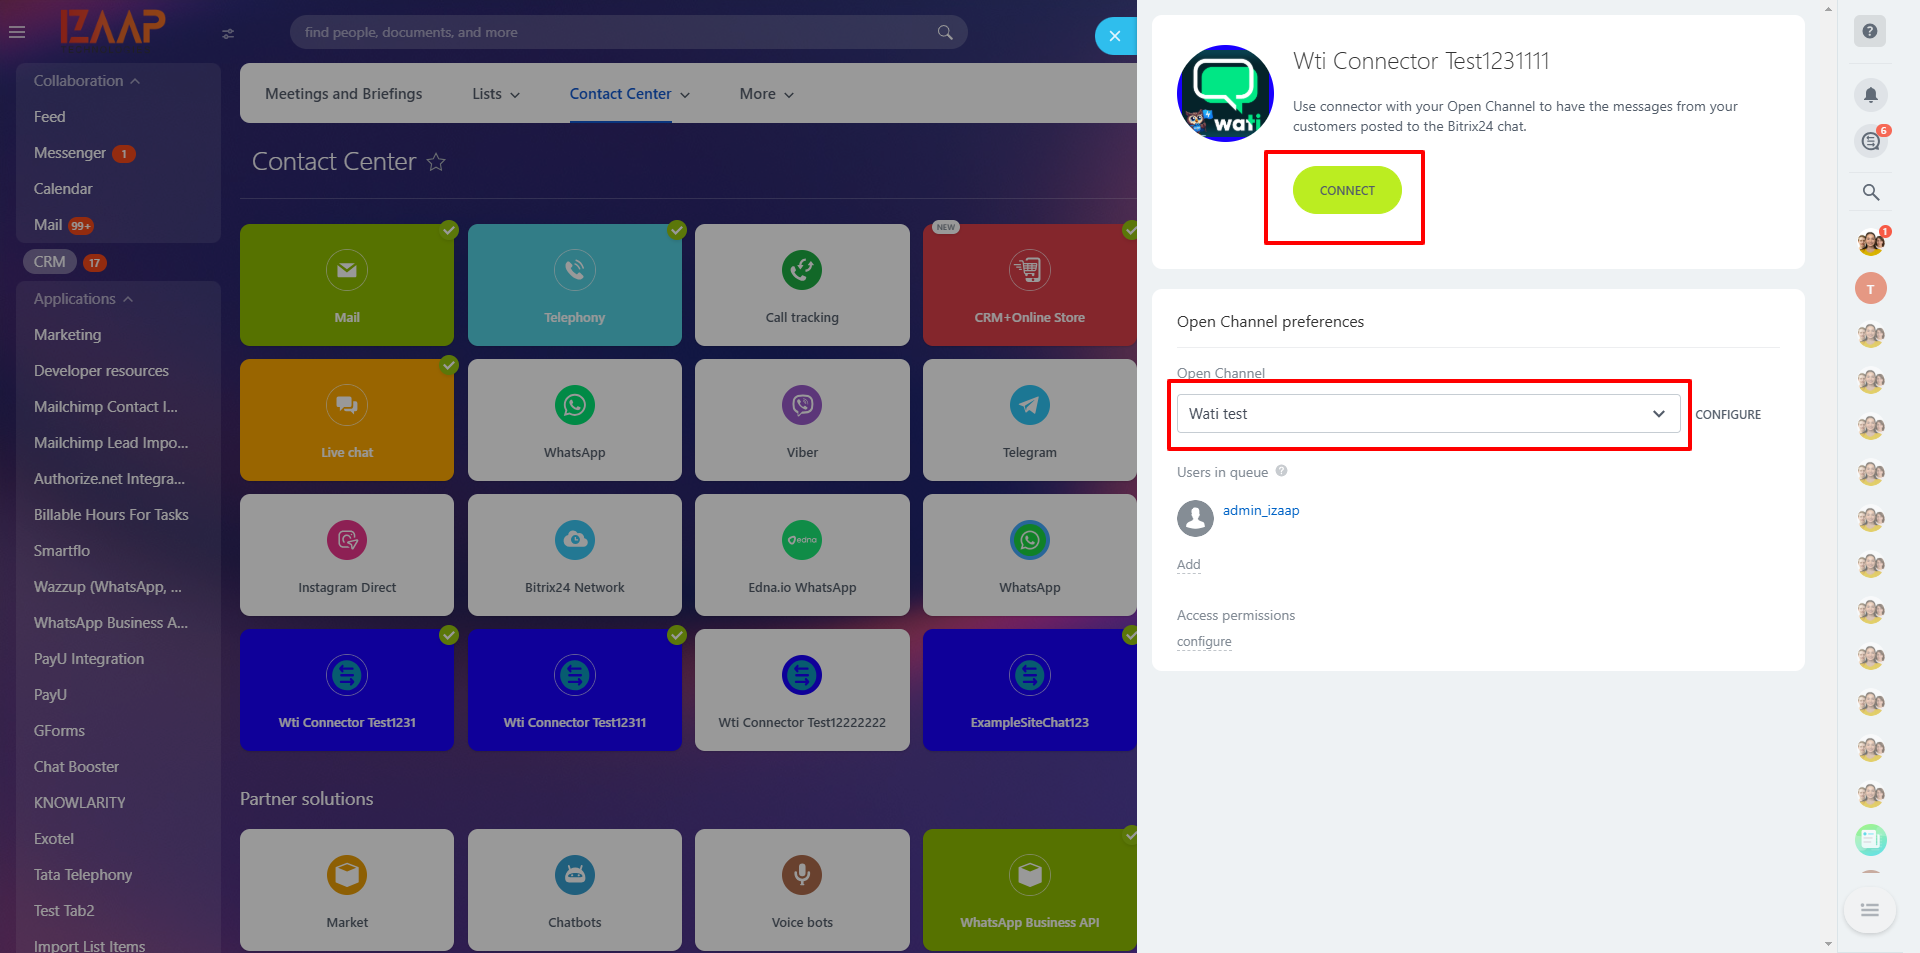
6.Connect and Configure the Wati Open Channel
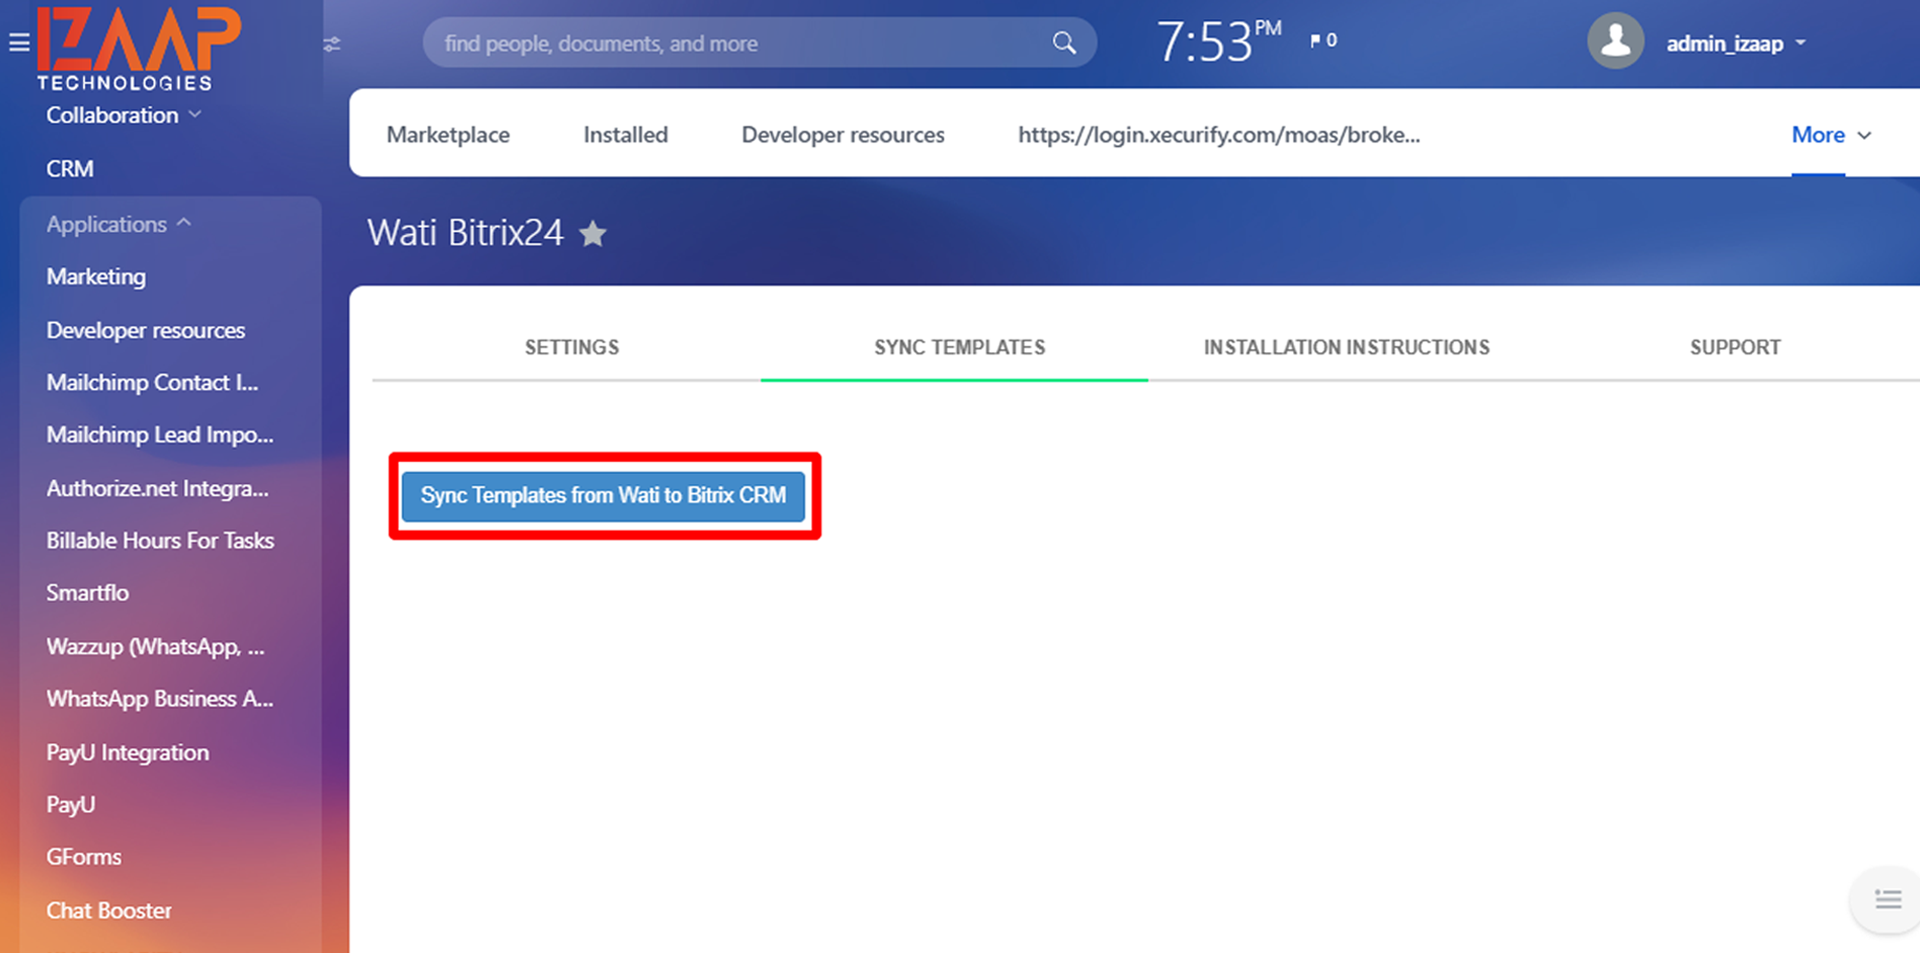
After installing the app, use the Sync Templates tab on the Marketplace app page to synchronize WATI templates with Bitrix24. This ensures that any new or updated templates in WATI are reflected in Bitrix24.
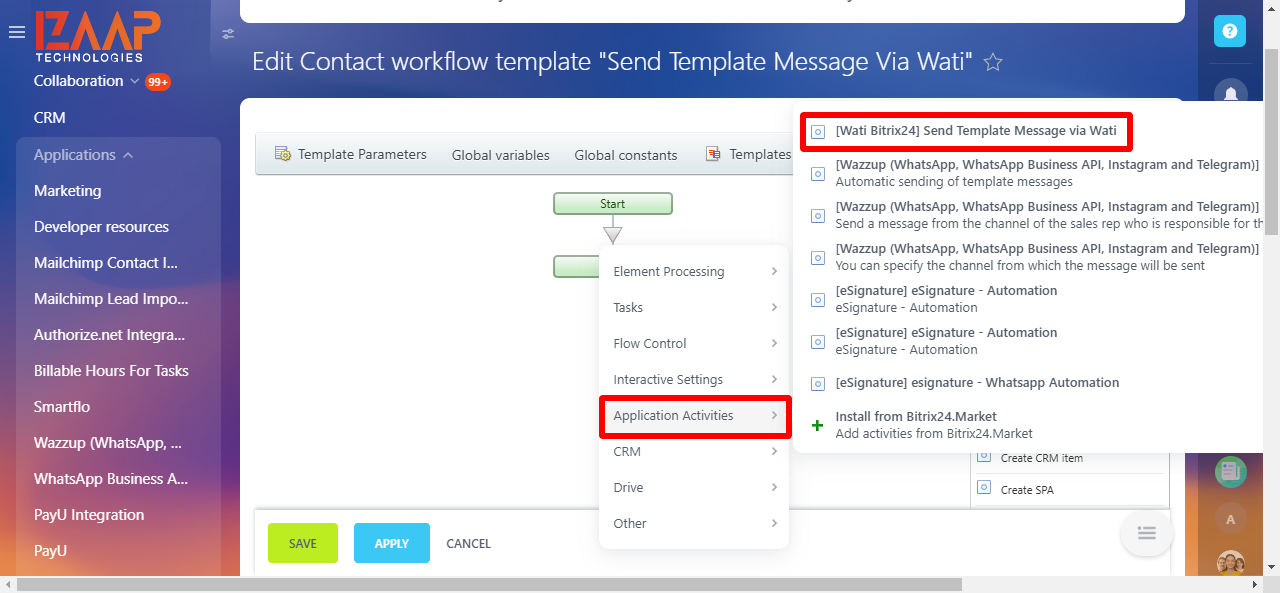
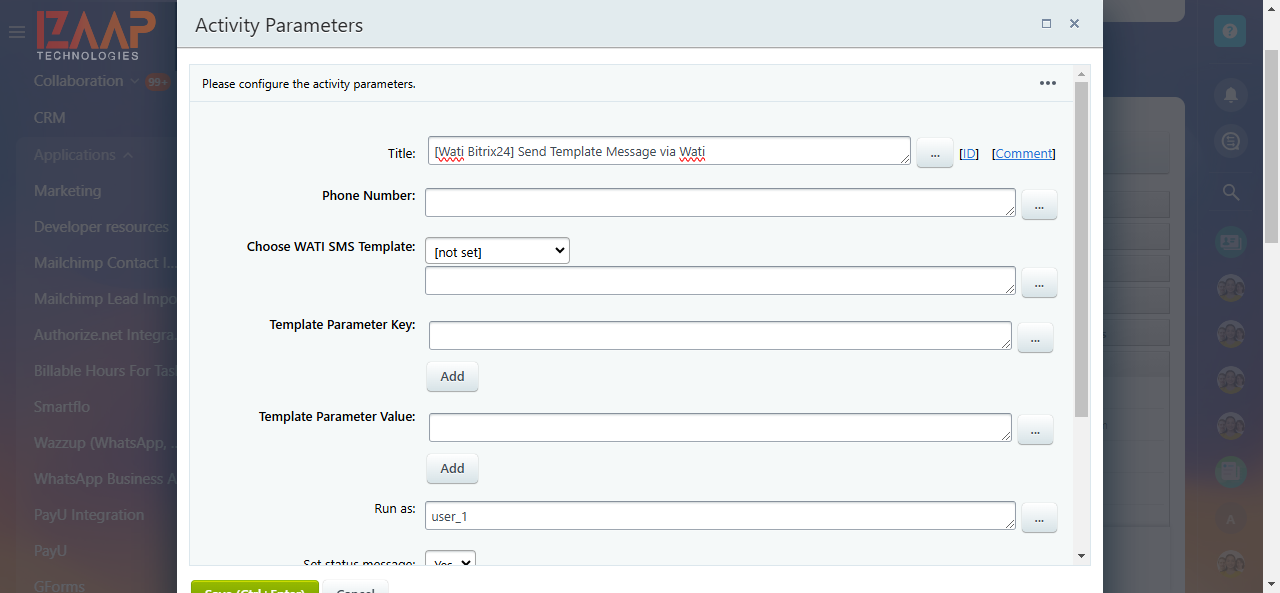
In Bitrix24 CRM, you can send template messages to customers using workflows. To do this, navigate to Workflows → Application Activities → [Wati API] Send Template Message. Enter the customer’s phone number, select the desired Wati template, and specify the template parameter key and value. Once done, click Send. After sending the message, the response will be available in the additional results section of the workflow.
Please note that in Wati templates, parameter variables are enclosed in curly braces {}. When configuring the workflow, ensure that the template parameter variables are entered in the template parameter key field, and their corresponding values are specified in sequential order, matching the structure of the Wati template. If the template parameter key and value fields are left empty, the system will automatically use the key and value defined in the Wati template. The workflow response will include details such as the message status, recipient’s phone number, and Wati template information.
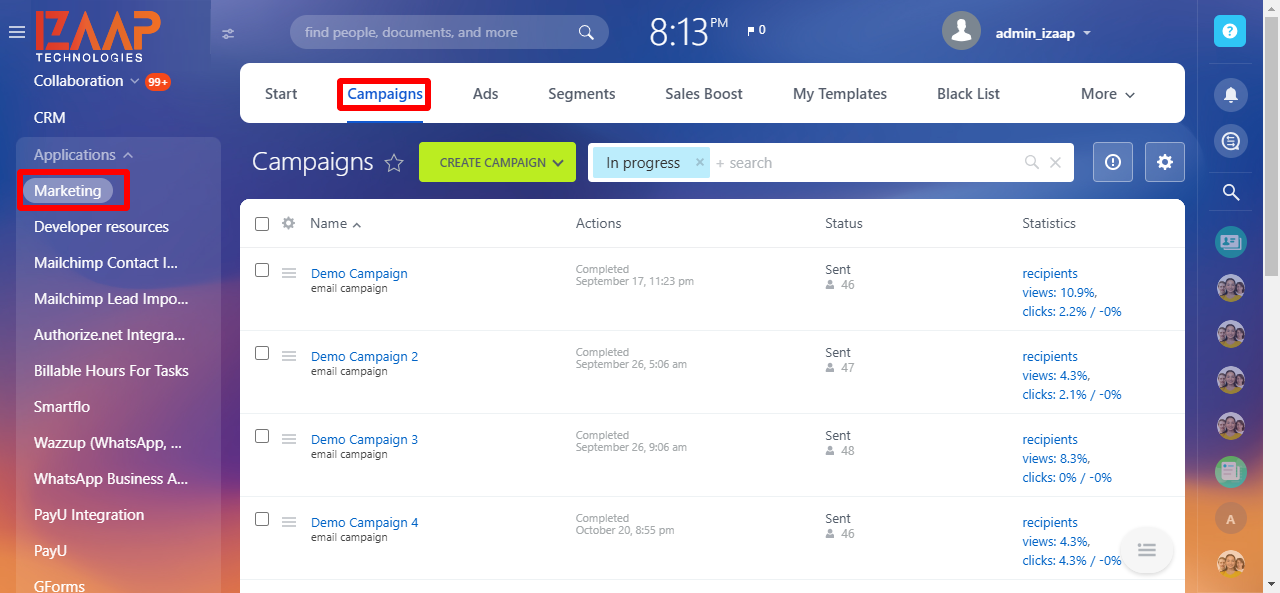
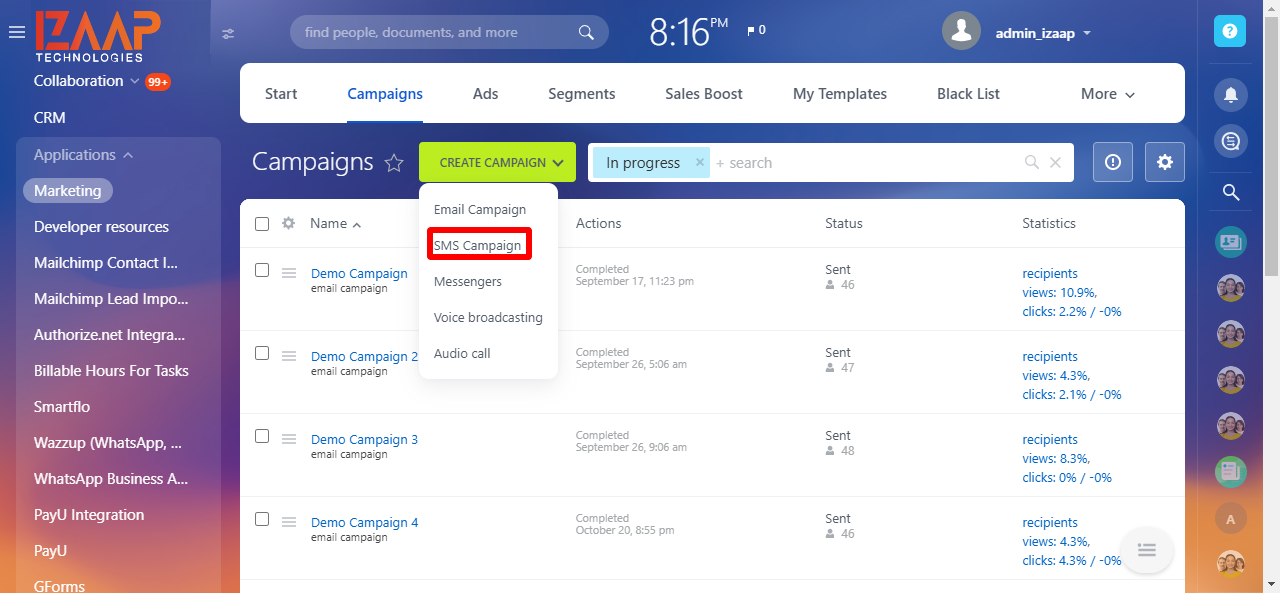
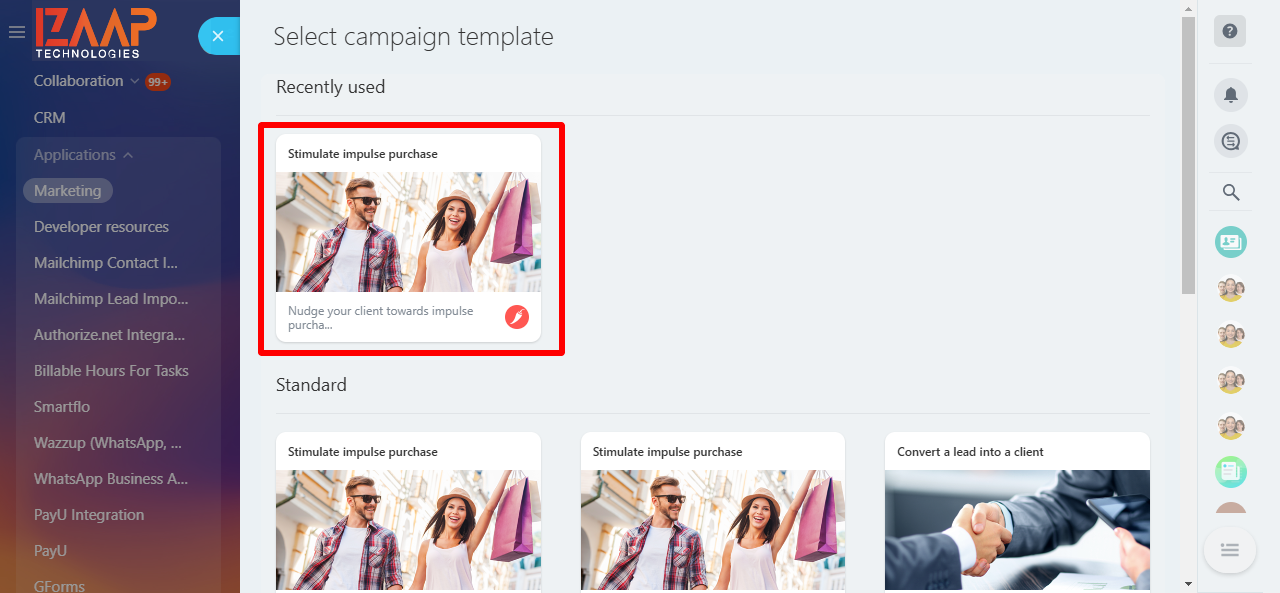
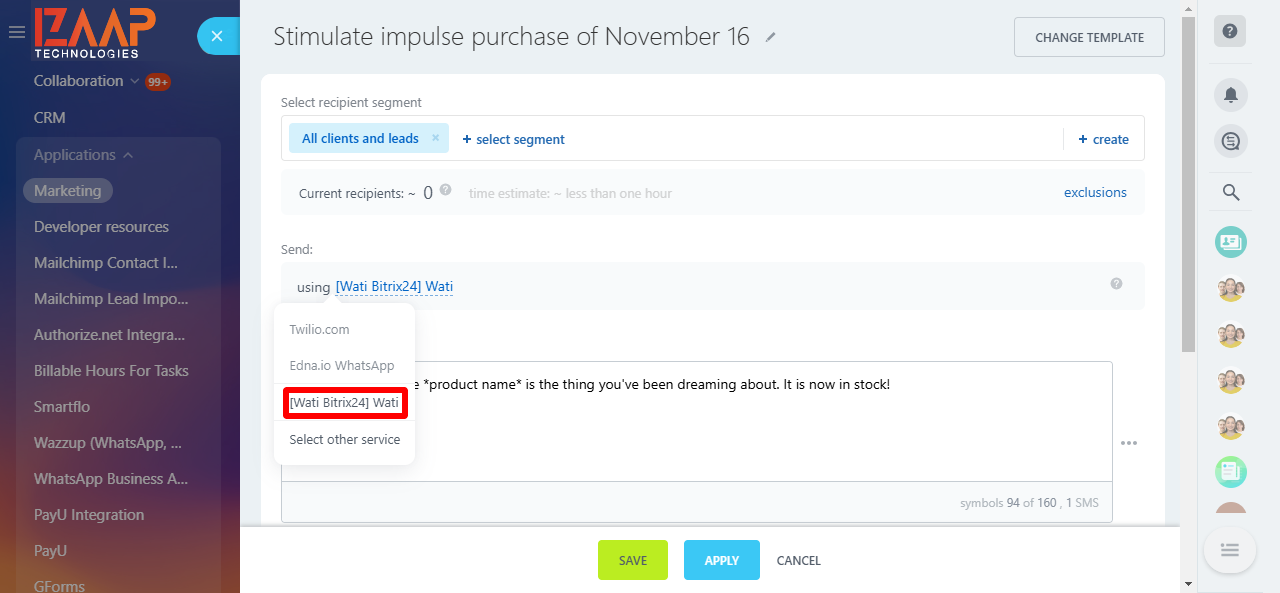
To send a bulk message campaign to your customers, navigate to the Marketing menu in Bitrix24 CRM and select Campaign from the top menu. Choose SMS Campaign as the campaign type and select the desired template.
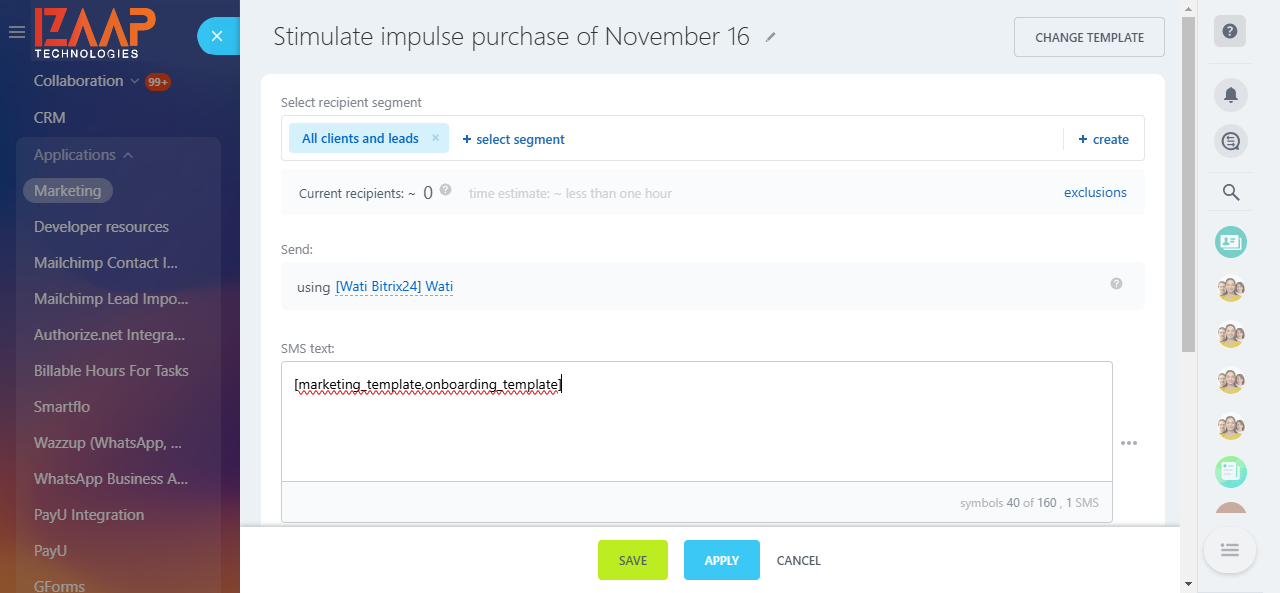
After selecting the template, specify the SMS provider type and create a target segment. In the message textbox, enter the template names in the following format: [wati_template, wati_template2]. You can copy the template names from your Wati account under the Broadcast section and paste them in the specified format.
Once the campaign details are saved, you can schedule the sending date and time. After the template messages are sent to customers, you can track the delivery details on the SMS campaign listing page.

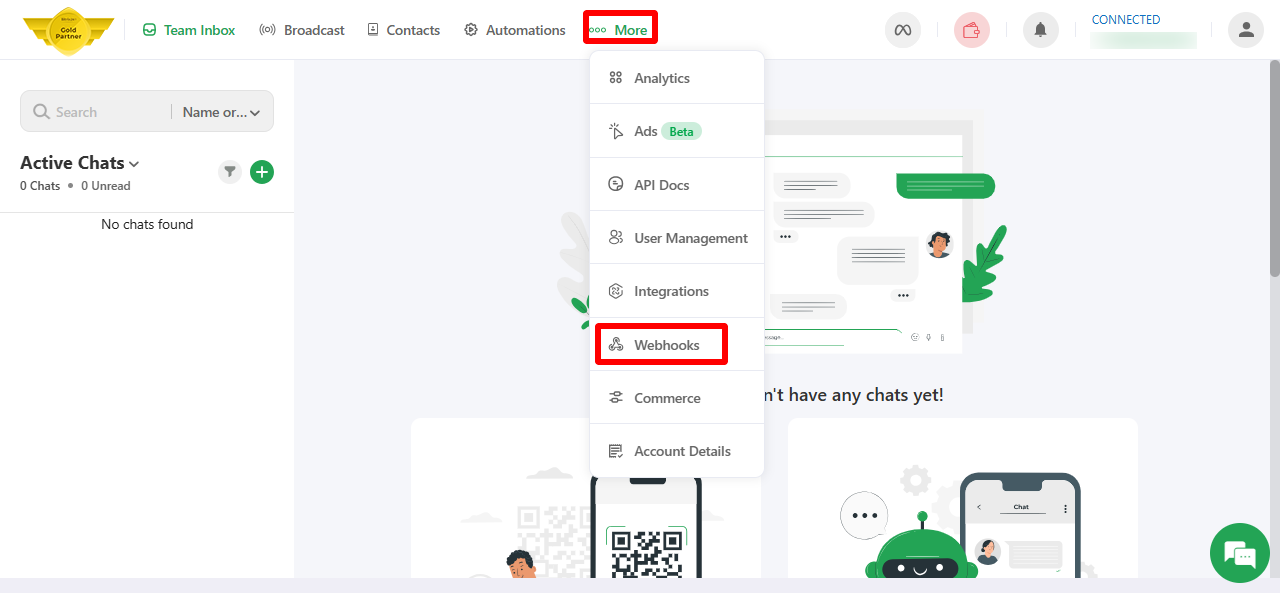
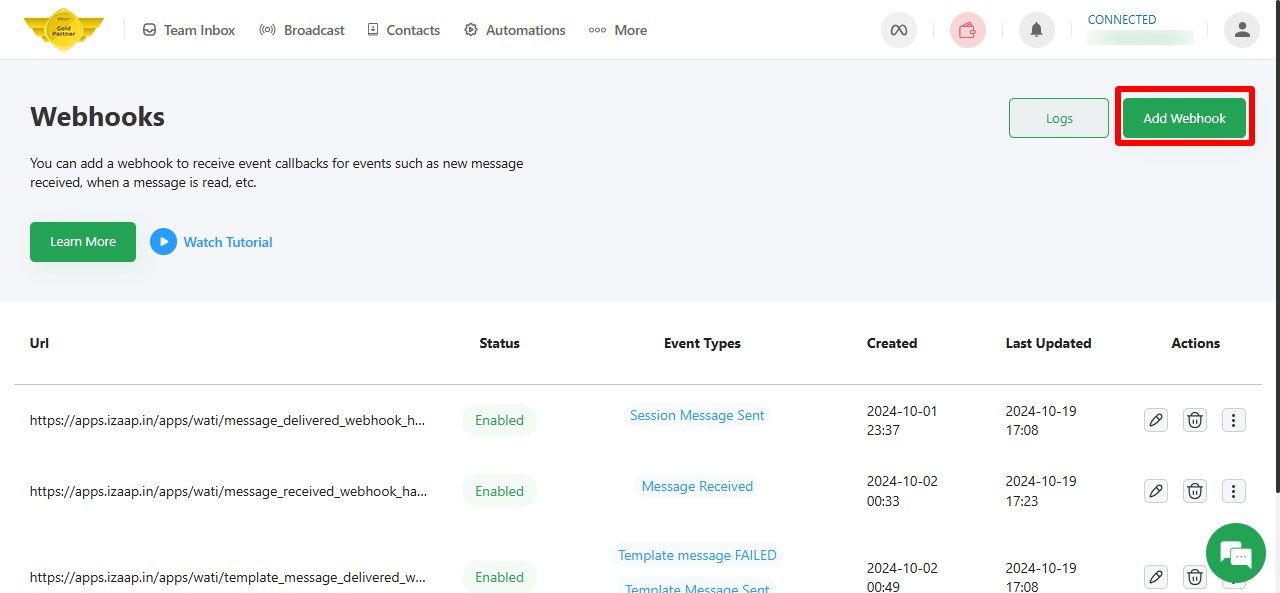
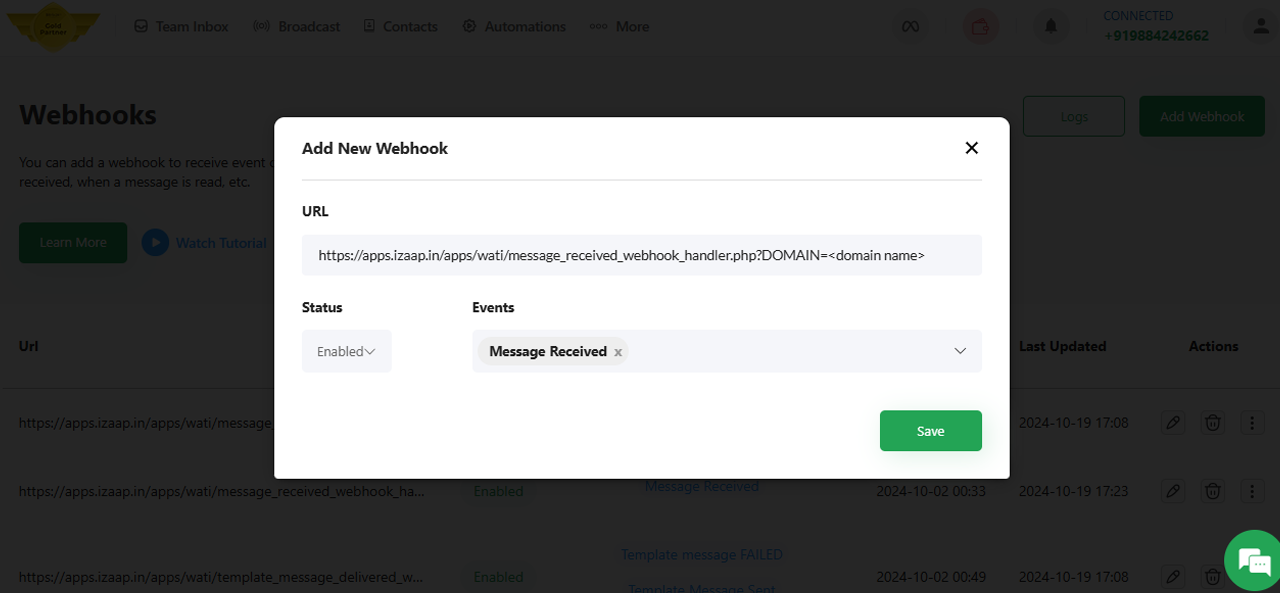
To capture incoming customer messages and track sent message statuses, configure the following webhook URL in the Wati webhook settings. In your Wati account, navigate to More → Webhooks → Add Webhook. Enter the provided handler URL, select the relevant event type, choose the Enabled option from the dropdown menu, and save your settings.
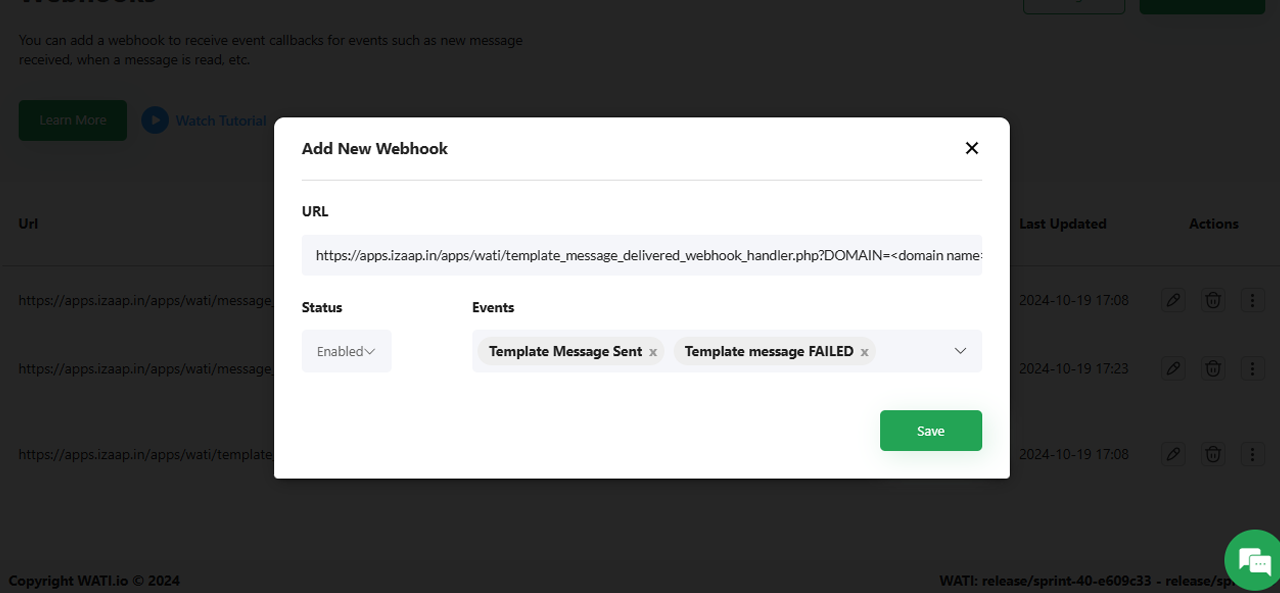
In your WATI account, go to More → Webhooks → Add Webhook. Enter the following webhook URLs:
** Note: Replace your Bitrix portal URL at the end of web hook URL that’s highlighted in
https://apps.izaap.in/apps/wati/message_received_webhook_handler.php?DOMAIN=YOUR BITRIX24 DOMAIN
https://apps.izaap.in/apps/wati/template_message_delivered_webhook_handler.php?DOMAIN=YOUR BITRIX24 DOMAIN
https://apps.izaap.in/apps/wati/message_delivered_webhook_handler.php?DOMAIN=YOUR BITRIX24 DOMAIN
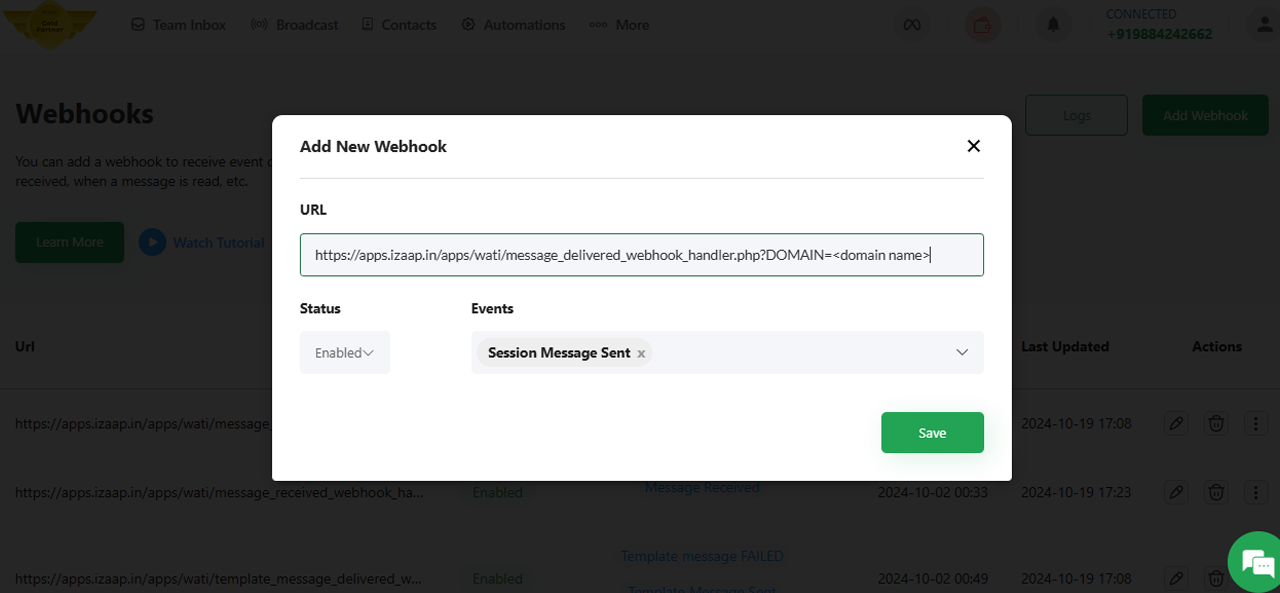
Choose the appropriate event type, enable the webhook, and save.
Conclusion
The WATI Bitrix24 Integration is a powerful tool for businesses looking to unify their communication channels, automate messaging workflows, and deliver a seamless customer experience. By following the steps above, you can easily set up and start using WATI within Bitrix24 to enhance your customer engagement.
For further assistance, please refer to the WATI Support Center

The WATI Bitrix24 Integration is a powerful tool for businesses looking to unify their communication channels, automate messaging workflows, and deliver a seamless customer experience.